Windows 10 is made up of hundreds of components, all coming together to provide a good user experience. However, in some cases, these components may seem more of a headache than a blessing. Recently, many came online to share their experiences and report issues with a component called TrustedInstaller.
Many users have expressed their frustrations with the TrustedInstaller not allowing them to delete or modify files in some system locations. In some cases, TrustedInstaller uses high CPU resources and slows down the computer.
In this post, you’ll learn what the TrustedInstaller is and how to fix or remove the TrustedInstaller in Windows 10.
Table of Contents
- What Is the TrustedInstaller in Windows 10?
- Should I Remove TrustedInstaller?
- How To Fix TrustedInstaller Corruption and High CPU Usage
- Method 1. Run the System File Checker (SFC Scan)
- Method 2. Use a System Restore Point
- Method 3. Run a Malware Scan
- Final Thoughts
What Is the TrustedInstaller in Windows 10?
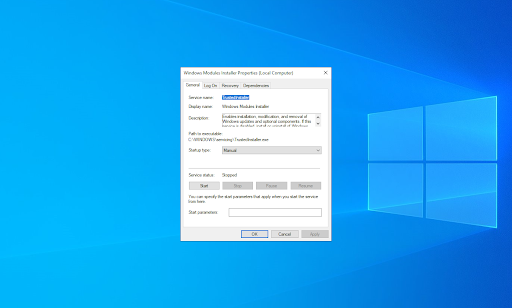
The TrustedInstaller is a Windows Modules Installer component, responsible for helping you install, modify and remove updates and other Windows components. It’s essentially a built-in, hidden “user account” in Windows 10, as well as Windows 8 and Windows 7.
It “owns” some of your system files, such as various files in your Program Files folder, and your Windows folder. This, in and of itself, doesn’t cause many issues, but some users have been fed up with the component blocking them from editing or deleting some folders and files.
For example, when trying to rename a folder, you may come across the following error: “You require permission from TrustedInstaller to make changes to this folder”. You might think that there’s nothing you can do to fix this, as TrustedInstaller is not a real user. However, we have some workarounds and methods to help you.
Should I Remove TrustedInstaller?
No, you shouldn’t remove TrustedInstaller under any circumstances. TrustedInstaller is not malware, and it can’t harm your computer other than causing CPU consumption.
It’s a necessary part of your operating system, responsible for handling complex operations within Windows 10. Without it, your system will end up corrupted, often beyond repair. If someone tells you to delete the TrustedInstaller, don’t listen to their instructions.
If you require access to system files, instead of removing the TrustedInstaller, you can take ownership of files and folders. This is a completely safe way of bypassing the TrustedInstaller protection, as long as you stay mindful of what files you can and can’t modify.
How To Take Ownership of Your Files
While the TrustedInstaller account owns your system files, it's possible to regain ownership of them if you want to modify them. Take into account that the module often prevents you from causing issues. For example, if you rename the System32 folder, your operating system will stop working. TrustedInstaller blocks you from renaming this folder in order to prevent damage.
Warning: Only proceed with these steps if you’re an advanced user and know what you’re doing. We highly recommend creating a system restore point and backing up important files before modifying any system folder.
- Open the File Explorer. This can be done by clicking on the Explorer icon in your taskbar, or by pressing the Windows + E keys on your keyboard.
-
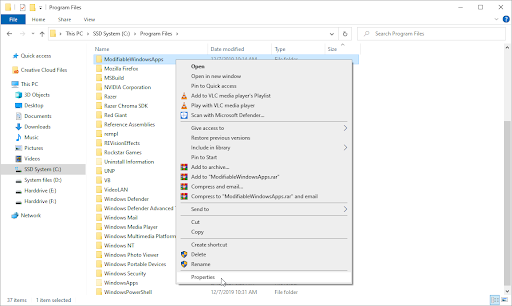
Locate the file or folder you want to take ownership of. Right-click on it, and then choose Properties from the context menu.
-
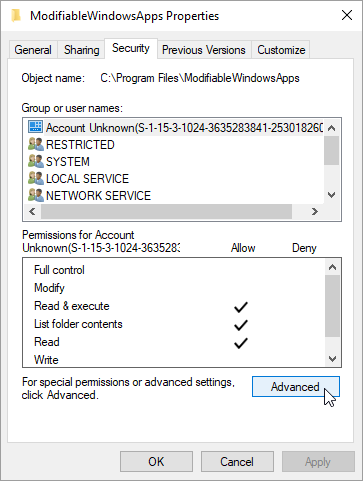
A new window will appear. Here, switch to the Security tab, and then click on the Advanced button to access special permission and settings.
-
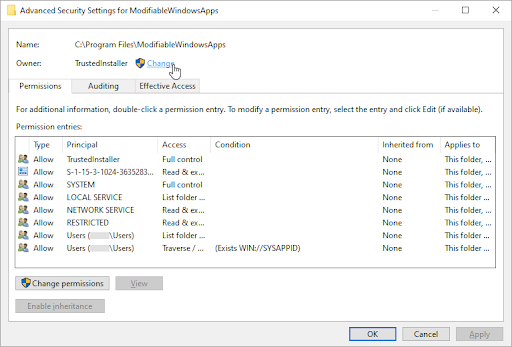
Click on the Change link next to the current owner of the folder or file, which should be TrustedInstaller. You’ll need administrative permissions to be able to do this.
-
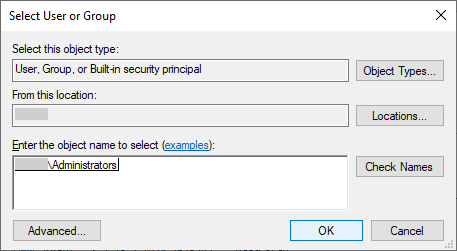
Type Administrators in the Enter the object name to select field, then click on the Check Names button. The system should automatically input the full name. When done, click the OK button.
-
Make sure to place a checkmark next to the Replace owner on subcontainers and objects option. This is going to apply the modification to all files and folders within the main one.

-
Afterward, select a group selected and click on the Edit button. A new window should open up.

-
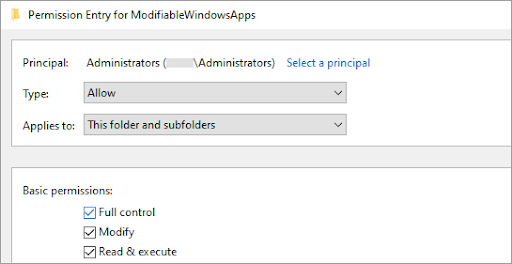
Click on Select a principal and choose the Administrators group as you did in Step 5. Place a checkmark next to the Full Control option to grant administrator accounts full permissions to the folder and its files.
- Click the OK button twice to save your changes and exit the advanced properties window. Now, you should be able to work with the folder and/or files you previously couldn’t delete or modify.
Repeat these steps for any more folders and/or files you want to modify. You should be able to edit and delete system files now. If you feel that you often need to repeat these steps, we highly recommend looking into downloading a .reg file that adds the “Take Ownership” option to your right-click context menu.
How To Fix TrustedInstaller Corruption and High CPU Usage
In some cases, the TrustedInstaller service or account may become corrupted. This can lead to many issues, especially because the account is tied to system files. If you think that the TrustedInstaller is using too much CPU or it has been corrupted, follow the methods below to fix it.
These corruptions can be caused by abrupt shutdowns, a new Windows Update, or malware infections. To ensure your files are safe, use an antivirus app like Kaspersky Anti-virus 2021.
Method 1. Run the System File Checker (SFC Scan)
The System File Checker (SFC) is a troubleshooting tool available in Windows 10 by default. It’s able to automatically detect corrupted system files, and repair them to working order. You can use the SFC scan to potentially fix any corruption with the TrustedInstaller account.
- Open the search bar in your taskbar by clicking on the magnifying glass icon. You can also bring it up with the Windows + S keyboard shortcut.
-
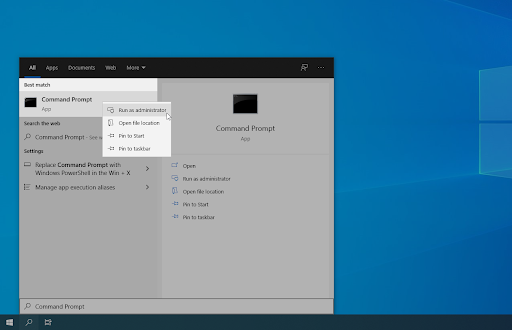
Type in Command Prompt. When you see it in the results, right-click on it and choose Run as Administrator. If you need help, check out our How to make a local user an administrator in Windows 10 guide.
- When prompted by the User Account Control (UAC), click Yes to allow the app to launch with administrative permissions.
-
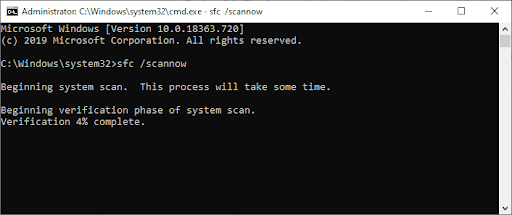
Once the Command Prompt window is open, type in the following command and press Enter to execute it: sfc /scannow
- Wait for the SFC scan to finish scanning your computer and repairing any corrupt files it locates. This may take a long time; ensure that you don’t close the Command Prompt or shut down your computer.
- Restart your device once the command has been executed.
The TrustedInstaller should function as intended now. If you still experience high CPU usage or any similar issues tied to the module, continue reading.
Method 2. Use a System Restore Point
If you feel that your system is functioning poorly and the System File Checker isn’t able to help, we recommend rolling back to a restore point. If you or your system created a suitable restore point, you’ll be able to return to it and continue using your computer with the settings at that time. This could fix TrustedInstaller corruptions.
- Open the search bar in your taskbar by clicking on the magnifying glass icon. You can also bring it up with the Windows + S keyboard shortcut.
-
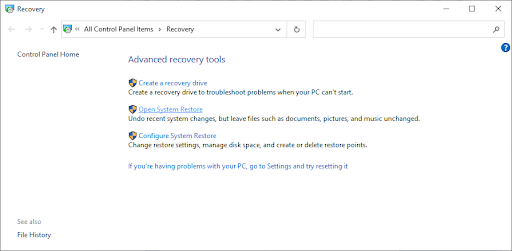
Type in System Restore and click on Recovery from the search results. This should be on the top, in the Best match category.

-
Click on the Open System Restore link in the Advanced recovery tools section.
-
Follow the on-screen instructions to restore a past point in time. You can select a restore point yourself, or use the recommended one. Make sure to check what files and applications will be affected when you restore your system.
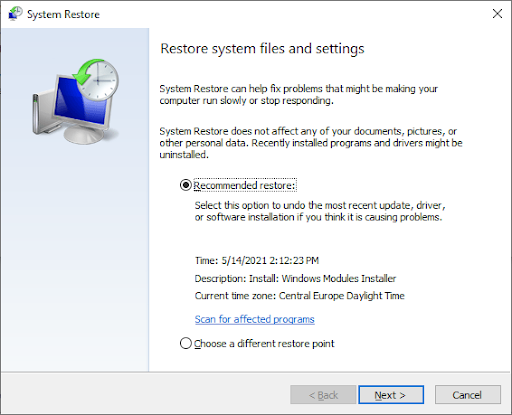
- After choosing the options you’re happy with, click on the Finish button and wait for Windows 10 to restore your computer.
After completing the restoration process, check if TrustedInstaller is still causing high CPU usage. Don’t see an improvement? Continue reading to ensure your system isn’t infected with malicious malware.
Method 3. Run a Malware Scan
While highly unlikely, there is a small chance that TrustedInstaller.exe is infected with malware, or it was replaced by malicious software. If you want to stay safe, we recommend running a full system scan for malware.
We’ll be using the built-in Windows Defender to conduct a system scan, however, a more focused third-party antivirus solution may work better.
- Open the search bar in your taskbar by clicking on the magnifying glass icon. You can also bring it up with the Windows + S keyboard shortcut.
-
Type in Windows Security and launch it from the search results.

-
Switch to the Virus & Threat Protection tab using the home screen or the menu in the left-side pane. Click on the Scan Options link.

-
Select the Full scan option. This is going to check every single file on all of your drives to ensure no threats can hide. Take note that this scan may last over 1-2 hours, depending on how many files you have on your system.
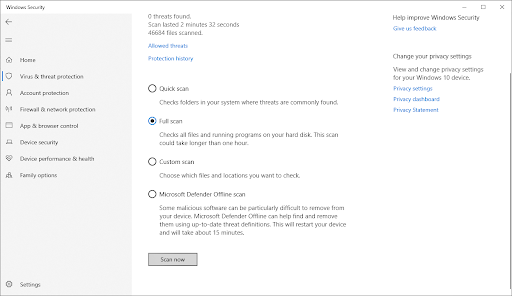
- Click on the Scan now button to begin the scan. If a threat is detected, Windows 10 will automatically quarantine or remove it entirely. You can review the scan results afterward.
Final Thoughts
We hope this post has helped you understand what the TrustedInstaller is on your computer and whether you should remove it. If you need further help, our Help Center offers hundreds of guides to assist you. Return to us for more informative articles, or get in touch with our experts for immediate assistance.
One More Thing
Would you like to receive promotions, deals, and discounts to get our products for the best price? Don’t forget to subscribe to our newsletter by entering your email address below! Be the first to receive the latest news in your inbox.
You May Also Like
» What is the WMI Provider Host? Is it Safe?
» What is Microsoft Visual Studio? Where can I download it?
» What is Werfault.exe and how to fix it on Windows 10?