

Before installing Windows Server 2012, make sure your computer meets the minimum system requirements.
For Windows Server 2012 these are:
- Processor: 1.4GHz 64-bit processor (or faster)
- RAM: at least 512MB
- Free Disk Space: at least 32GB
Once confirmed, you’re now ready to install Windows Server 2012. Just follow the steps below:
Step-by-Step Guide on How to Install Windows Server 2012
Step 1: If you have the installation package on a DVD or bootable USB, you’ll first need to change your computer’s boot order so that it runs the installation package when you start it up.
You can change the boot order from your computer’s BIOS setup utility.
Step 2: With the boot order changed, you can now insert your Windows Server 2012 DVD or bootable USB and then start up your computer.
- Note: You may be prompted to start from the DVD or USB; just follow the instructions on-screen

Step 3: Setup will now load all the necessary files, which may take a few minutes

Once complete, you’ll see the following screen.
- Note: you can either keep the default values as they are or change them to suit your needs

Step 4: Click Next to continue with the installation and then click Install Now on the next screen.

The installation will start setting up, just wait for it to finish loading

Step 5: In the next screen, you’ll select the edition you want to install. If you’re installing either Standard or Datacenter editions, you’ll also need to pick if you wish to install as a Server Core or Desktop Experience (with GUI).
- Note: Server Core gives you a stripped-down version of a Windows server with a smaller footprint that takes up less CPU and RAM but is designed to be managed remotely and can be harder to administer locally. GUI, on the other hand, gives you a user-friendly experience that’s easier to operate with a comfortable dashboard

Step 6: Once you’ve selected your installation option, click Next, and you’ll be shown the License terms. After reading these, tick I accept the license terms and click Next again

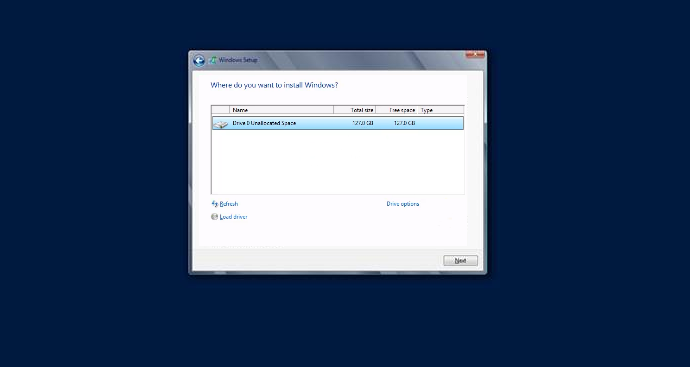
Step 8: Next, you’ll be asked where you want to install Windows Server. You can either install it on one of the drives or partitions shown in the list, or you can create a new partition, by clicking on Drive Options and then selecting New.
- Note: if you haven’t already, make sure you back up the contents of your hard drive before continuing, otherwise you may lose any data on the chosen drive/partition during installation
Step 9: Once you’ve selected where to install Windows Server, click Next. This step might take a while, and your computer may restart during the installation process; this is normal

Step 10: Once the setup is complete, your computer will restart again and start up in Windows Server 2012 for the first time. You’ll now be prompted to set up a username and password. Remember to choose a strong password then click Finish.

Step 11: Setup will now finalize your settings. One finished, you’ll be able to log in to Windows Server by clicking Ctrl+Alt+Delete, using the username and password you created above

After you log in, Windows Server will show you the Server Manager

That’s it! You’ve now installed Windows Server 2012 and are ready to go! You can also read our guide here on how to install Windows Server 2012 R2.
If you’re looking for a software company you can trust for its integrity and honest business practices, look no further than SoftwareKeep. We will be with you before, during, and after all the sales.