

It’s never been easier to have a meeting. You can schedule all this in Microsoft Outlook. You set up the meeting, and a few clicks will direct your team members to the video conference. It's easier for them so they will be more motivated to attend. Outlook can directly link to Skype as well, so you can directly link the video conference. To schedule an online meeting to follow the procedure below;

- Click on the “New Items” button under the “Home” tab.
- From the drop-down menu select “Meeting”. From the “Meeting” window you will need to select the “Join Skype Meeting”. With this feature, you could have a meeting with someone from the other side of the earth.
- Add your details: “Subject” and then the “Location” of the meeting.
- You could invite multiple people and have a large business gathering.
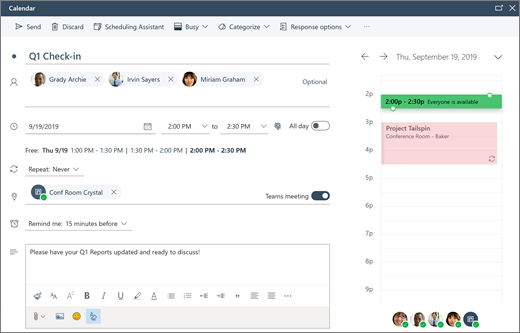
With Outlook, you can see when your invitees are free with the “Scheduling” tab. This tool will allow you to see when’s the best time for your meeting.
Once you pick the perfect time, send the invitation to everyone.
Whether you're scheduling online meetings or want to book a meeting room, having the right tools and support can make all the difference. With Outlook you're well-equipped for successful meetings.
Schedule with Outlook on the web
Schedule a calendar event or meeting
-
Select the calendar.
-
Select New event.
-
Enter the details, location, start time and end time.
-
If this is a meeting, add the names or email addresses of the people you want to invite.
Select Scheduling assistant to see everyone’s free/busy times (Exchange users).
-
To make this a recurring meeting, select Repeat, and choose how often.
-
Select Save or Send.
Send an automatic reply (Out of Office message)
-
Select Settings > Mail > Automatic replies.
-
Select Automatic replies.
-
Select Turn on automatic replies.
-
If you have specific times you want the automatic replies to run, select Send replies only during a time period and enter the Start time and End time.
-
Type your reply.
-
Select Save.
What Next
If you’re looking for a software company you can trust for its integrity and honest business practices, look no further than SoftwareKeep. We are a Microsoft Certified Partner and a BBB Accredited Business that cares about bringing our customers a reliable, satisfying experience on the software products they need. We will be with you before, during, and after all the sales.