In some cases, especially when creating large presentations, the file size of your project may go up to a rather large number. This can make it difficult to share your finished presentation, especially if you’re using email services or a USB to store it on.
To help combat this issue, PowerPoint comes with options to compress various elements and reduce the file size or projects. You can compress images, videos, convert 3D objects to static images or even use the PPTX or ZIP formats to further optimize file size.
Our article focuses on all the methods to help you compress PowerPoint files and create more shareable presentations.
Jump to Solution
- Method 1: Compress images in PowerPoint
- Method 2: Compress videos in PowerPoint
- Method 3: Swap 3D models with static images
- Method 4: Convert your presentation to PPTX Format
- Method 5: Compress PowerPoint presentations as a ZIP file
Method 1: Compress images in PowerPoint
The first way to reduce the file size of your presentations is definitely compressing the images used in your slides. Images with large resolution can quickly start generating large file sizes.
Oftentimes when making a presentation, there’s no need for large images to be displayed on the screen, so compressing your images won’t harm the final outcome. According to our tests, correctly compressed images can help you reduce the file size of your presentation by 17 times.
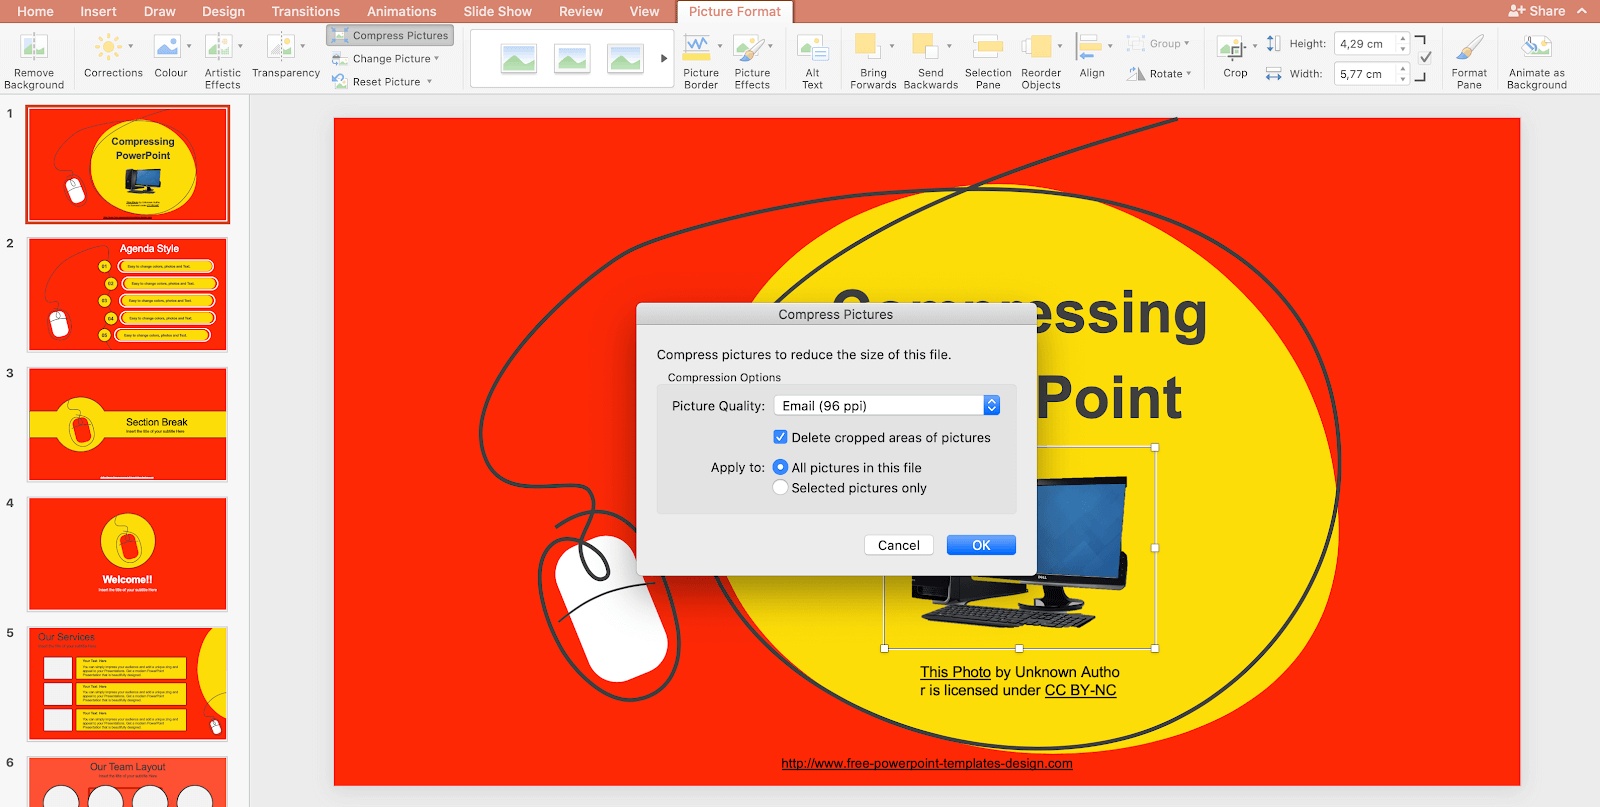
- Select the picture you want to compress. This will open up the Pictures Tools Format tab in the ribbon on top of your screen.
- Click on the Compress Pictures button.
- Select the desired picture quality and options. The lower the PPI number, the more compressed your image will be.
- Make sure to check “Delete cropped areas of pictures” and choose whether you want to apply the compression to all pictures in your presentation, or selected pictures only.
- Click the OK button. You should immediately see the changes in quality and notice the reduced file size.
Method 2: Compress videos in PowerPoint
It’s not a secret that video files can be huge. If you have videos embedded into your presentations, it’s not uncommon that you’ll end up with a large file size that’s hard to transfer between devices, USB’s and email. To make sure your presentation doesn’t exceed file size limits, you can try to compress the videos in it.
- Open your presentation in PowerPoint, then navigate to the File tab and go to the Info page within the backstage view.
- When video files are detected in your presentation, you'll be able to see the Compress Media button. Simply click on it, then choose the desired quality. In most cases, compressing to 1080p or 720p will significantly reduce the file size of your presentation.
- A new window will open up showing the progress of the compression and determining how much space was saved. Wait for the process to finish.
- Check your video and make sure you’re happy with the quality. If you want to undo the compression, navigate back to File > Info > Compress Media, and choose to Undo the last compression.
Method 3: Swap 3D models with static images
(Source: Nuts & Bolts)
While 3D models are definitely useful and give your presentations more visual interest, they definitely increase the file size of the finished product. If you’re working with a limited amount of space, we recommend swapping 3D models with static images. You can use images from the internet, or even take a screenshot of the model and insert it manually.
- If you want to replace the 3D model entirely, simply select it and press the Delete button on your keyboard. This will remove all traces of the model from your presentation as soon as you save it, and significantly reduce the file size.
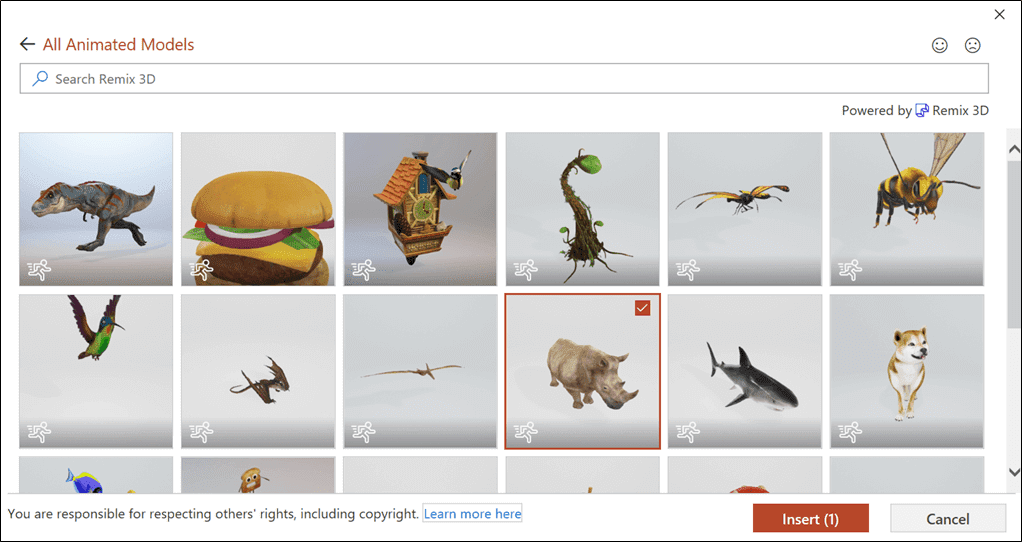
- Insert an image in place of the 3D model by using the Insert > Image menu. You may choose one from your computer, or look for one online within PowerPoint.
If you want to replace the 3D model with a static image of the model itself, follow these steps.
- Create a new, blank slide with a white background.
- Insert the 3D model you want to use and position it in any way you want to.
- Take a screenshot using the Windows + Shift + S keyboard shortcut. This shortcut allows you to select a region of the screen instead of screenshotting the entire desktop. Select your 3D model on a white background.
- On Mac, you can use the Command + Shift + 4 shortcut to do the same.
- Delete the 3D model and the blank slide, then insert the screenshot of your model in place of the original.
- If needed, select the screenshot and click on Picture Format > Remove Background. This will get rid of the white background, creating a transparent static image of your 3D model.
Method 4: Convert your presentation to PPTX Format
Your presentation might be saved in the PPT format. This format is quite large compared to PPTX, which is the format used in files created post-2007, alongside the release of PowerPoint 2007. The optimized format aims to reduce the file size of presentations, making transfer much less of a hassle.
If you saved your presentation in the PPT format, don’t worry. There are plenty of free, online tools you can use to convert a PowerPoint presentation into the PPTX format. Here’s how.
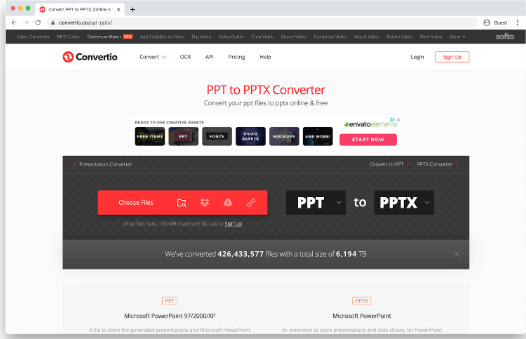
- Open the Convertio PPT Converter in your web browser. This is an entirely free-to-use website that allows you to convert a PPT file into PPTX online.
- If your file is over 100 MB, click on the Sign Up button and create a free account. Otherwise, proceed to the next step.
- Click on the Choose Files button and select your PPT presentation.
- Make sure to select PPT to PPTX using the drop-down menus for file types.
- Follow on-screen instructions and convert your presentation into the PPTX format. You should immediately see a decrease in file size.
Method 5: Compress PowerPoint presentations as a ZIP file
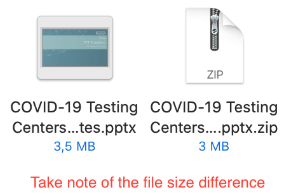
As a last resort, you can save some space by sharing your presentation as a ZIP file. These compressed files are handy if you want to keep all of your original images, videos, models, and other elements, but still need to reduce the file size.
Here’s how you can convert a PowerPoint presentation into a ZIP on Windows 10. Make sure to scroll to the next section if you’re on a Mac system!
- Open the File Explorer and navigate to the location of your saved presentation.
- Right-click on the presentation file and hover over the Send to option.
- Choose the Compressed (zipped) folder option.
- Wait for Windows to finish compressing your file. When finished, you’ll be left with a ZIP file that has a reduced file size and provides better shareability.
The instructions for Mac systems are as follows.
- Open the Finder and navigate to the location of your presentation.
- Right-click on the presentation and select Compress “(Presentation name)”
- Wait for the process to finish. You should see a smaller ZIP file with the same name as your original presentation created.
Conclusion
We hope that this article helped you compress PowerPoint presentations and reduce the file size for easier sharing. Show your world the hard work you put into your presentations without having to sacrifice quality!
Keep Learning
» What Is PowerPoint Viewer? How Can I Use It? (Part 1)
» What Is PowerPoint Viewer? How Can I Use It? (Part 2)
» What Is PowerPoint Viewer? How Can I Use It? (Part 3)
» How To Use PowerPoint Design Ideas: A Complete Guide
» 7 Useful Tips to Build More Creative MS PowerPoint Templates