Did you experience a system crash with the SYSTEM_SERVICE_EXCEPTION (dxgmms2.sys) error code? Click here to learn what it is, how to fix it, and how to prevent it from happening again in the future.
If your system crashed and you saw the SYSTEM_SERVICE_EXCEPTION code, your DirectX Graphics MMS system file (dxgmms2.sys) is outdated or broken. This most commonly happens when your graphics card drivers are missing or not up-to-date.
System crashes, nicknamed the Blue Screen of Death (BSoD), have been a part of Windows ever since its beginnings. If your system runs into a serious error, it may crash and display some data to help you understand what went wrong. A lot of things can cause blue screen errors, and all of them have a solution.
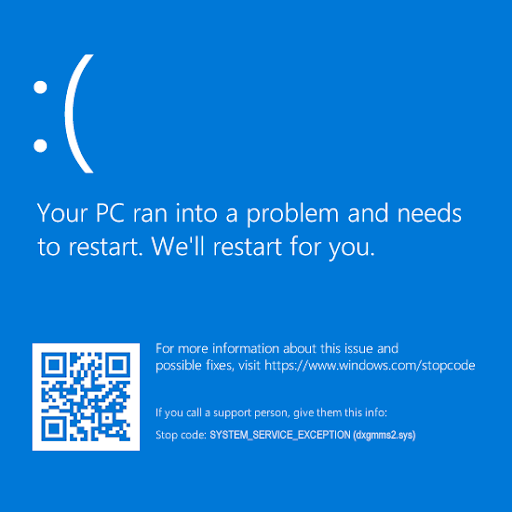
Table of Contents
- What Is a Blue Screen (BSoD) Error?
- How To Fix SYSTEM_SERVICE_EXCEPTION (dxgmms2.sys) in Windows 10
- Method 1. Repair Corrupted System Files
- Method 2. Update Your Graphics Card Drivers
- Option 3. Update your drivers with a third-party app
- Method 4. Update Windows 10 to the Latest Version
- Method 5. Run the Memory Diagnostics
- Method 6. Change the TdrDelay Value in Your Registry
- Method 7. Run the Blue Screen Troubleshooter
- Method 8. Reset or Reinstall Windows 10
- Final Thoughts
What Is a Blue Screen (BSoD) Error?
You get a “blue screen” error when your system suffers a fatal error. It’s a common issue that immediately stops your system, and forces it to reboot. It’s often an unpredictable error, but that doesn’t mean there’s nothing you can do to ensure it doesn’t happen twice for the same reason.
Most blue screen errors are associated with system-related issues that cause Windows to receive a “STOP” error, leading to a system crash. This happens without a warning, meaning that work can be lost, and files can occasionally get corrupted. Make sure to save frequently!

In older versions of Windows, the BSoD appeared rather unfriendly, with a wall of text and technical information littering the screen. This has been changed recently to a more comprehensible, user-friendly error screen, making it simpler to see what error you ran into. Knowing this error code will help you find solutions as well.
How To Fix SYSTEM_SERVICE_EXCEPTION (dxgmms2.sys) in Windows 10
This error has many possible causes, which naturally leads to many possible solutions. Find out how to solve the SYSTEM_SERVICE_EXCEPTION blue screen error, and get general troubleshooting tips to ensure it doesn’t return again.
Method 1. Repair Corrupted System Files
The first thing to try when having issues with the DirectX Graphics MMS system file (dxgmms2.sys) is running a couple of commands to restore corrupted files.
The System File Checker (SFC) is a troubleshooting tool available in Windows 10 by default. It can automatically detect corrupted system files, and repair them to working order. You can use the SFC scan to fix any corruption related to the dxgmms2 potentially.sys file.
We also recommend running the Deployment Image Servicing and Management (DISM) tool. This effectively re-deploys your system image in order to fix issues directly related to it. Instructions to run both of these commands can be found below:
- Open the search bar in your taskbar by clicking on the magnifying glass icon. You can also bring it up with the Windows + S keyboard shortcut.
-
Type in Command Prompt. When you see it in the results, right-click on it and choose Run as Administrator.

Note: If you need help, check out our How to make a local user an administrator in Windows 10 guide.
- When prompted by the User Account Control (UAC), click Yes to allow the app to launch with administrative permissions.
-
Once the Command Prompt window is open, type in the following command and press Enter to execute it: sfc /scannow

- Wait for the SFC scan to finish scanning your computer and repairing any corrupt files it locates. This may take a long time; ensure that you don’t close the Command Prompt or shut down your computer.
-
Next, type in and execute the following command: DISM /Online /Cleanup-Image /RestoreHealth

- Restart your device after both of the scans are complete.
Method 2. Update Your Graphics Card Drivers
It's extremely important that your graphics card driver is always up-to-date. Outdated drivers can cause more issues than you’d imagine. After major Windows 10 updates, compatibility issues can appear and cause all sorts of errors as well.
Your display driver may be outdated or damaged, which can cause the SYSTEM_SERVICE_EXCEPTION (dxgmms2.sys) error on your device. To fix this, you have 3 options for updating your driver:
Option 1. Update display adapter driver manually
-
Check the type of graphics card you’re using:
-
Press the Windows + R keys. Type in “dxdiag” and press the OK button. This is the shortcut to reach the DirectX Diagnostics tool.

-
Switch to the Display tab. Under Device, take note of the name and manufacturer of your graphics card.

-
Press the Windows + R keys. Type in “dxdiag” and press the OK button. This is the shortcut to reach the DirectX Diagnostics tool.
-
Go to the manufacturer’s website, and then navigate to their download page. Here are some of the most common manufacturers’ web pages where you can find driver downloads:
- Intel Drivers & Software page
- NVIDIA Driver download page
- AMD Drivers and support page
-
Find your graphics card model using the provided search tools, and download its newest driver.

- Download and install the latest driver by double-clicking on the downloaded file and follow the on-screen instructions. You might be prompted to restart your device.
Note: Always make sure that you’re always downloading and installing the correct driver that matches your graphics card. If you’re uncertain, try searching on Google, or contact the customer service of your manufacturer.
Option 2. Update display adapter driver automatically
-
Press the Windows + R keys. Type in “devmgmt.msc” without the quotation marks, and press the OK button. This will take you to the Device Manager window.

-
Expand the Display adapters section by clicking on the arrow icon to the left. Right-click on your current driver, and then select the Update driver option.

-
Click on Search automatically for updated driver software to allow Windows 10 to automatically update your driver. When you’re done, feel free to exit out of the Device Manager and restart your computer.

Option 3. Update your drivers with a third-party app
While it’s not necessary to use a third-party app for driver updates, it’s an option that is available to all Windows 10 users. You can also find and download third-party updater tools such as Driver Booster, DriverHub, or DriverPack Solution to automatically update drivers.

Most of these tools are free and easy to use. If you’re not satisfied with the service, we recommend searching the internet for more advanced apps.
Always make sure that the app you’re using is trustworthy. Some applications that offer to fix or update your drivers contain malware, adware, or spyware. We recommend searching the name of the product and reading reviews made by real users before downloading any software.
Method 3. Disable Hardware Acceleration
You can make a simple adjustment in the Registry to possibly fix the Blue Screen error. If you’re not familiar with this process, note that modifying the Registry may cause errors if done wrong — make sure to stick to our steps closely.
We highly recommend creating a Registry backup or a restore point on your device before proceeding.
- Open the search bar in your taskbar by clicking on the magnifying glass icon. You can also bring it up with the Windows + S keyboard shortcut.
-
Type in Registry Editor and click on the matching search result to launch the app.

-
Navigate to the following Registry key, or use the address bar and copy-paste the file’s location: HKEY_CURRENT_USER\Software\Microsoft\Avalon.Graphics. Here, right-click on any empty space and choose New → DWORD (32-bit) Value.

-
Name the key DisableHWAcceleration, and then double-click on it to open its properties. Set the Value data to 1 in order to disable the hardware acceleration in Windows 10.

- Exit the Registry Editor and reboot your computer.
Method 4. Update Windows 10 to the Latest Version
Your DirectX Graphics MMS system file (dxgmms2.sys) file may be restored on its own while upgrading to the latest Windows 10 release. An update is beneficial for many things - it can fix bugs, bring you new features, patch up security holes, and much more.
Here’s how you can update Windows 10:
-
Click on the Windows icon in the bottom left of your screen to bring up the Start menu. Choose Settings, or alternatively use the Windows + I shortcut.

-
Click on the Update & Security tile. This is where you can find most of your Windows Update settings and choose when to receive updates.

- Make sure to stay on the default Windows Update tab. Click on the Check for updates option and wait for Windows 10 to find available updates.
-
If you see any updates already displayed, click on the View all optional updates link to see and install them.

- If an update is found, click on the Install option and wait for Windows 10 to download and apply the necessary updates.
Method 5. Run the Memory Diagnostics
Users have reported that running the Memory Diagnostics tool helped them prevent the system crash caused by dxgmms2.sys.
- Open the search bar in your taskbar by clicking on the magnifying glass icon. You can also bring it up with the Windows + S keyboard shortcut.
-
Type in Windows Memory Diagnostics and click on the matching search result.

-
Choose the option that is more convenient for you, and then allow the utility to check your device and identify problems with your memory.

- Once the check is complete, your device will reboot and a report will be generated about the issues found.
Method 6. Change the TdrDelay Value in Your Registry
There is a simple Registry edit you can make in order to fix the SYSTEM_SERVICE_EXCEPTION blue screen error.
If you’re not familiar with this process, note that modifying the Registry may cause errors if done wrong — make sure to stick to our steps closely. We highly recommend creating a Registry backup or a restore point on your device before proceeding.
- Open the search bar in your taskbar by clicking on the magnifying glass icon. You can also bring it up with the Windows + S keyboard shortcut.
-
Type in Registry Editor and click on the matching search result to launch the app.

- Navigate to the following key, or use the address bar and copy-paste the file’s location: HKEY_LOCAL_MACHINE\SYSTEM\CurrentControlSet\Control\GraphicsDrivers.
-
Check if you have a value called TdrDelay. If the key is missing, right-click on any empty space and choose New → DWORD (32-bit) Value and name it TdrDelay.

-
Double-click on the TdrDelay key to open its properties. Set the Value data to 10. Doing so will increase the response time for your GPU to 10 seconds, as opposed to the default 2 seconds.

- Exit the Registry Editor and reboot your computer.
Method 7. Run the Blue Screen Troubleshooter
Windows 10 comes with many built-in troubleshooters to help you fix issues without having to contact a support agent. While the troubleshooter may not be able to restore the files and progress you lost due to the SYSTEM_SERVICE_EXCEPTION error, it may help prevent another crash in the future.
-
Click on the Windows icon in the bottom left of your screen to bring up the Start menu. Choose Settings, or alternatively use the Windows + I shortcut.

-
Click on the Update & Security tile. This is where you can find most of your built-in troubleshooters.

-
Switch to the Troubleshoot tab using the left-side pane. Here, you should be able to see a troubleshooter titled Blue Screen.

-
If you don’t share full diagnostic data to Microsoft, click on the Additional troubleshooters link and locate the Blue Screen troubleshooter there.

- Click on the Run the troubleshooter button.
- Wait for the troubleshooter to identify the issue and apply any possible fixes. Please note that your device may shut down and restart during this process. When it’s finished, see if you’re able to access your boot device.
Method 8. Reset or Reinstall Windows 10
If nothing above worked, your issue may only be fixed if you reset or reinstall Windows 10. Depending on your preferences, you may reinstall the system without losing any personal files. Unfortunately, most of your applications and system configuration will be deleted in order to give your device a fresh start.
Check our How to Install Windows 10, 8.1 or 7 Using a Bootable USB guide for detailed, step-by-step instructions on how to install Windows 10. For refresh and reset instructions, head to the official Microsoft support page.
Final Thoughts
Our Help Center offers hundreds of guides to assist you if you’re in need of further help. Return to us for more informative articles, or get in touch with our experts for immediate assistance.
One More Thing
Would you like to receive promotions, deals, and discounts to get our products for the best price? Don’t forget to subscribe to our newsletter by entering your email address below! Be the first to receive the latest news in your inbox.
You May Also Like
» How To Fix System Service Exception Error In Windows 10» How to Fix “Netio.sys” Blue Screen Errors on Windows 10
» How to Solve Stop Code Memory Management on Windows 10