

It is standard practice to conduct Windows Updates to fix OS issues and other bugs that might affect your Windows performance. Updates often include driver updates, service packs, and Windows patches. However, sometimes updates can bring issues to your Windows OS that affects user experience.
A case example is the Sedlauncher.exe file Windows 10 Update that often causes high disk usage and other OS issues. Many Windows users have encountered high CPU usage after updating the Sedlauncher.exe file in Windows 10 patch KB4023057.
In this article, we answer the question 'what 'sedlauncher.exe' file is. As a bonus, we discuss if it should be disabled?

Table of Content
- What is Sedlauncher.exe?
- Should you disable Sedlauncher.exe?
- How to Fix Sedlauncher.exe Full Disk Usage on Windows 10
- Fix #1: Disable Sedlauncher.exe from Task Manager
- Fix #2: Turning off Sedlauncher.exe in Services
- Fix #3: Block Sedlauncher.exe with Windows Firewall or Antivirus Program
- Wrapping Up
What is Sedlauncher.exe?
Immediately after updating Windows 10 update patch KB4023057, you'll see the sedlauncher.exe program occupying much of your disk space. This can slow your PC's performance.
Microsoft explained that Windows 10 update patch KB4023057 was released to improve the reliability and user experience of Windows 10 Update Service Components. It supports different versions of Windows 10, including items in this image:
- Version 1507,
- Version 1511,
- Version 1607,
- Version 1703,
- Version 1709,
- Version 1803.
The Update patch KB4023057 may also help free up your device's disk space if your PC runs out of disk space to install Windows updates successfully. Additionally, this Windows 10 update patch KB4023057 patch is what comes with the sedlauncher.exe file to help update Windows 10 successfully without any unexpected error.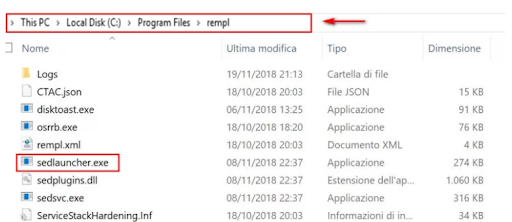
The sedlauncher.exe program is located in the 'C:\Program Files 'within the folder' rempl. 'It is included in the Windows Remediation Service to speed up and safeguard the Windows 10 update process. But this can also cause the issue of high disk usage. It works like other Windows Update support programs, such as:
- sedsvc.exe,
- rempl.exe,
- Luadgmgt.dll,
- Sedplugins.dll
The high disk space usage can disappoint users who may ask why an update file can consume such high volumes of RAM and CPU.
Should you disable Sedlauncher.exe?
It is worth noting that sedlauncher.exe a digitally signed Microsoft product. It is not malware or a virus.
However, if sedlauncher.exe is not located in the 'C:\Windows 'or 'C: \Windows\System32' folder, you should conduct a full system scan for your AV to remove it if it is malware. Some malware camouflage as a legit process located in the same file locations.
Besides, if sedlauncher.exe is causing High CPU usage (sometimes up to 100%) and lowering your PC's speed and functionality, you can disable it temporarily or permanently.
How to Fix Sedlauncher.exe Full Disk Usage on Windows 10
Use the following solutions to fix the sedlauncher.exe full disk Usage on Windows 10:
Note: before you proceed to disable and fix the sedlauncher.exe using the solutions, scan your PC with quality antivirus software to ensure that it is not malware or a virus. If it is a virus, the antivirus software will remove it automatically.
Fix #1: Disable Sedlauncher.exe from Task Manager
You can fix the Sedlauncher.exe high CPU usage issue by ending its process in the Task Manager. To do this:
- Right-click your Task Bar
-
Select Task Manager

-
In Task Manager, scroll down until you see Windows Remediation Service (WRS)

- Right-click the WRS and select End task.
After ending the Windows Remediation Service, which also contains the Sedlauncher.exe, restart your PC then check if there is an improvement in your PC system's speed.
Fix #2: Turning off Sedlauncher.exe in Services
Windows Services is also a PC management tool. You can disable the sedlaucher.exe in the Services utility and change the properties of the service. To turn off Sedlauncher.exe in services, use the following steps:
- Launch the Run utility; Press Wins Key + R
- In the Run dialog box, type 'services.msc 'then press Enter.
-
In the Services, scroll down to locate Windows Remediation Service.

- Right-click on Windows Remediation Service > and choose properties.
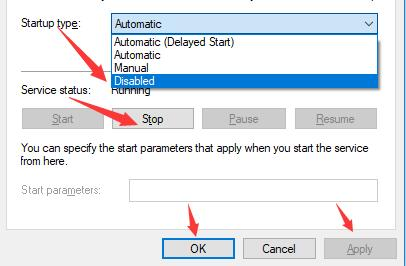
- Under the General tab, click Startup type.
- In the dropdown menu, choose Disabled > then select Apply.
-
Under the Service status, click Stop.
One done, Restart your computer, then go to the Task Manager and see of the Sedlauncher.exe is still running.
Fix #3: Block Sedlauncher.exe with Windows Firewall or Antivirus Program
Sedlauncher.exe is important in the KB4023057 update patch. After that, it doesn't have much work on the PC. You can disable it if you realize that it consumes much disk space.
If, after disabling it, you realize that it downloads again on your PC, set your Windows Firewall or a third-party antivirus block it. Once it is blocked, it won't be able to run on your PC.
Wrapping Up
A program that consumes much of your PC's disk space can reduce your computers' speed and affect its functionality. It is best to remove it. We believe that this post has helped you learn how to fix the Sedlauncher.exe file on Windows 10 to free up your disk Usage.
Would you like to receive promotions, deals, and discounts to get our products for the best price? Don't forget to subscribe to our newsletter by entering your email address below! Receive the latest technology news in your inbox and be the first to read our tips to become more productive. Don't let a chance go.
Next Article
You may like reading:
> Fixed: Print Spooler Keeps Stopping on Windows 10
> Fix Page Fault In Nonpaged Area Error In Windows
> Fix “Windows Update components must be repaired” Error on Windows 10