http://oktec.kr/?big=en-au/blogs/news.atom SoftwareKeep - SoftwareKeep Blog 2024-07-04T06:03:08-07:00 SoftwareKeep http://oktec.kr/?big=en-au/blogs/news/automatic-log-in-windows 2024-06-28T17:01:47-07:00 2024-06-28T17:01:47-07:00 How to Log in Automatically in Windows 10/11 Sara Alsaqaf More

]]>
Automatic login is a handy feature that can save you from entering your password repeatedly every time you start your computer. It's especially useful if you use your computer in a secure, private location without worrying about unauthorized access.

Enabling automatic log in can make your computer usage more efficient, especially if you're the only one using the device. However, weighing the convenience against the potential security risks is important. By the end of this article, you'll clearly understand how to set up automatic login and the considerations to keep in mind to maintain your system's security.

In this guide, we cover everything you need to know about setting up automatic login for Windows 10 and Windows 11, from the initial setup to troubleshooting, ensuring a seamless experience.

What is Automatic Login in Windows?

Windows 11 log in screen

Automatic login in Windows is a feature that allows your computer to bypass the login screen and directly boot to your desktop or start screen. As you turn on or restart your computer, you won't need to enter your username and password to access your account manually. Instead, Windows will automatically log in to a pre-selected user account.

While automatic login offers significant convenience, its potential as a security risk shouldn't be addressed, especially if your computer is in a shared or public environment.

Why Enable Automatic Login?

Before we dive into the setup process, let's discuss why you might want to enable automatic login. This feature can be particularly beneficial for:

  • Convenience: You no longer need to enter a password each time you start your computer, saving you a few precious moments each day.
  • Ease of Access: Ideal for those with difficulty typing or remembering passwords.
  • Single User Environments: Perfect for personal computers not shared with others, reducing the need for multiple user accounts and logins.

However, it's essential to remember that automatic login bypasses the password requirement, which could pose a security risk if multiple people use your computer or are in a public area.

How to Set Up Automatic Login in Windows 10

Setting up automatic login in Windows 10 is straightforward. Follow these steps:

  1. Press Win + R on your keyboard to open the Run dialog box. Type "netplwiz" and press Enter. This command opens the User Accounts window.

    Run netplwiz in Windows


  2. The User Accounts window will display a list of your computer's user accounts. Select the account you want to log in automatically. Uncheck the box that says, "Users must enter a username and password to use this computer." Click Apply.

    Users must enter a username and password to use this computer


  3. After clicking Apply, a dialog box will appear, asking you to enter the password for the selected account. Enter the password and confirm it. Click OK to save the changes.
  4. Restart your computer to see if the changes have taken effect.

Your computer should now log in automatically to the selected account without prompting for a password.

How to Set Up Automatic Login in Windows 11

Windows 11 has a slightly different interface, but the process for setting up automatic login is similar. Here's how:

  1. Press Win + R to open the Run dialog box. Type "netplwiz" and press Enter to open the User Accounts window.

    Windows 11 run netplwiz


  2. Select the user account you want to log in automatically. Uncheck the option "Users must enter a username and password to use this computer." Click Apply.

    Users must enter a username and password to use this computer Windows 11


  3. A prompt will appear asking for your password. Enter your current password and confirm it. Click OK to finalize the settings.
  4. Restart your computer to ensure that the automatic login is working.

Your computer should log in automatically to the selected account.

How to Fix Automatic Login Not Working on Windows 10/11

While setting up automatic login is generally straightforward, you might encounter some login issues. Here are a few common problems and how to fix them:

1. Automatic Login Not Working

If automatic login isn't working, double-check that you've entered the correct password and that the "Users must enter a username and password to use this computer" option is unchecked.

2. Password Prompt Still Appears

Ensure that no group policies are overriding your settings. You can check this by opening the Group Policy Editor (gpedit.msc) and navigating to Computer Configuration -> Administrative Templates -> System -> Logon. Make sure the policy "Always use classic logon" is not enabled.

3. Security Concerns

If you're worried about security, consider setting up a PIN or biometric login for added protection while still enjoying the convenience of automatic login. Windows Hello can be a great alternative, offering security and ease of access.

Alternatives to Automatic Login

If you're concerned about security but still want a quick login process, consider these alternatives:

Windows Hello

Windows Hello in Windows 11

Windows Hello is a biometric authentication feature in Windows 10 and Windows 11 that allows users to log in using facial recognition, fingerprint scanning, or a PIN. This provides a more secure and convenient alternative to traditional passwords.

Before enabling Windows Hello, ensure your device supports it. Modern laptops and PCs with built-in cameras or fingerprint readers support Windows Hello. You can purchase compatible external hardware if your device doesn’t have these features.

Here’s a step-by-step guide on how to enable Windows Hello on your device:

  1. Open the Start menu and select Settings. In the Settings window, click on "Accounts."
  2. Click on "Sign-in options" in the left sidebar.
  3. Under "Windows Hello Face," click the "Set up" button and then click "Get started." Follow the on-screen instructions to scan your face using the device's camera.
  4. Under "Windows Hello Fingerprint," click the "Set up" button and then click "Get started." Follow the on-screen instructions to scan your fingerprint using the fingerprint reader.
  5. Under "Windows Hello PIN," click the "Add" button. Enter your Microsoft account password to verify your identity, then create and confirm a new PIN.
  6. Lock your computer by pressing Win + L and then log back in using the Windows Hello method you set up (face, fingerprint, or PIN).

Fast User Switching

Fast user switching allows multiple users to log in to a computer without logging out the current user. It's a good compromise between security and convenience.

Sleep Mode

Sleep mode is a power-saving state that allows users to quickly resume their work without going through a full startup process, making it a convenient alternative to system shutdown. Sleep mode saves the current state in RAM, enabling instant resumption of activities providing speed, energy efficiency, and security while maintaining user session while consuming minimal power.

Conclusion

Automatic login can significantly enhance your computing experience by saving time and simplifying access to your desktop. However, it's crucial to weigh the convenience against potential security risks.

Following the steps outlined in this guide, you can easily set up automatic login on your Windows 10 or Windows 11 device and enjoy a more streamlined workflow. Remember to implement additional security measures to protect your data and maintain the integrity of your system.

With this comprehensive guide, you can now enable automatic login on your Windows device.

]]>
http://oktec.kr/?big=en-au/blogs/news/how-to-use-powerpoint-templates 2024-06-28T00:00:01-07:00 2024-06-28T05:33:15-07:00 How to Find and Use Microsoft PowerPoint Templates Sara Alsaqaf Elevate your presentations with PowerPoint templates. These pre-designed slides can help you create professional-looking presentations with ease.

More

]]>
Microsoft PowerPoint templates are essential for creating professional and visually appealing presentations quickly and efficiently. But how do you find and use PowerPoint templates? The answer is simpler than you'd imagine.

Whether you're a beginner or an experienced user, templates make a significant difference in the quality of your work. From finding free and paid templates online to utilizing the ones included in PowerPoint, you'll discover various options to elevate your presentations, empowering you with new tools and exciting possibilities.

Let's explore the world of PowerPoint templates, which can help you make a lasting impression with your slides.

What Are PowerPoint Templates?

PowerPoint template example

PowerPoint templates are pre-designed slide layouts that you can use as a starting point for your presentations. They come with various design elements like backgrounds, fonts, colors, and graphics that help create a cohesive look. Templates save time and ensure that your presentation maintains a professional appearance throughout.

PowerPoint templates come in a wide array of styles and formats, catering to different needs and professions. The diversity is exciting, offering a range of options to explore and experiment with. Here are five common types of templates:

  • Business Templates: Ideal for pitching ideas, presenting business plans, or proposing projects, these templates include professional layouts with sections for objectives, strategies, financial plans, and timelines.
  • Educational Templates: These templates are designed for teachers and students and often include lesson plans, course outlines, and interactive elements to make learning engaging and organized.
  • Marketing Templates: Perfect for marketing professionals, these templates help create compelling presentations for campaigns, product launches, market analysis, and social media strategies.
  • Creative Templates: These templates are suited for designers, artists, and creatives. They feature bold colors, unique layouts, and customizable elements to showcase portfolios, creative projects, and artistic ideas.
  • Financial Templates: Essential for finance professionals, these templates include charts, graphs, and tables to present financial data, annual reports, budget plans, and investment analyses clearly and effectively.

Why Use PowerPoint Templates?

Using PowerPoint templates offers several advantages. They provide a consistent design, crucial for maintaining a professional image. More importantly, they save time, allowing you to focus on the content of your presentation. Templates also inspire creativity by offering new design ideas and layouts you might not have considered.

Where to Find PowerPoint Templates

Built-in PowerPoint Templates

Built-in PowerPoint templates

One of the easiest ways to get started with PowerPoint templates is to use the ones included in the software. Microsoft PowerPoint comes with various built-in templates covering a range of topics and purposes. To access these templates:

  1. Start the program and click on "File" to open the menu.
  2. Choose "New" from the menu options.
  3. You'll see a selection of templates categorized by different themes and purposes. Choose one that fits your needs and start customizing.

Downloading Templates Online

Download PowerPoint templates

The internet is a treasure trove of PowerPoint templates. You can find free and paid options catering to various industries and presentation types. Some popular websites to download PowerPoint templates include:

  • Microsoft Office Templates: Microsoft offers a collection of templates on its official website. These templates are designed to work seamlessly with PowerPoint and are regularly updated to include new designs.
  • Envato Elements: This subscription-based service provides access to thousands of professional PowerPoint templates. It's ideal for users who need a wide variety of high-quality templates.
  • SlideModel: SlideModel offers a vast library of templates you can purchase individually or access through a subscription. They provide templates for business, education, marketing, and more.
  • Free PowerPoint Templates: Websites like SlideHunter and Presentation Magazine offer free templates to download and use. While the selection might be smaller, it's a great resource for budget-conscious users.

Using Third-Party Templates

Third-party templates can significantly expand your design options. Professional designers often create templates you can customize to fit your presentation's needs. To use third-party templates:

  1. Download the template to save its file to your computer. The file extension should be ".ppt" or ".pptx" for PowerPoint to open the file. If you downloaded a template in a different file format, it may not be compatible with PowerPoint.

    How to download PowerPoint template


  2. Open PowerPoint and go to "File" > "Open" to locate and open the downloaded template.
  3. Modify the template to suit your presentation content. Adjust text, images, and other elements as needed.

Free vs. Paid PowerPoint Templates

Free PowerPoint templates are widely available and can be a great starting point for beginners. They offer a variety of designs and can be used for personal or professional presentations. However, free templates might have design quality and customization options limitations.

On the other hand, paid templates typically offer higher-quality designs and more advanced features. Professional designers create them, and they can be more versatile and customizable. Investing in paid templates can be worthwhile if you frequently create presentations and need various design options.

How to Use PowerPoint Templates

Using PowerPoint templates effectively goes beyond simply downloading and importing a template. Customizing templates to fit your content and maintaining a consistent design throughout are important to get the most out of a PowerPoint template.

Customizing PowerPoint Templates

Customizing templates is essential to make your presentation unique and tailored to your audience. Here are some customization tips:

  1. Edit Text: Replace any placeholder text with your content. Ensure that the text is clear, concise, and relevant. If necessary, adjust the text boxes to accommodate your text better.
  2. Add Images: Incorporate images that support your message. Use high-quality images to enhance the visual appeal. To customize your slides further, use tools such as the built-in background remover and image effects.
  3. Modify Colors and Fonts: Adjust the colors and fonts to match your brand or presentation theme. Consistency is key to maintaining a professional look.

Consistency in design is crucial for creating a professional presentation. To maintain a cohesive and polished look, stick to a uniform color scheme, font style, and layout throughout your slides.

Adding Animations and Transitions

Animations and transitions can add a dynamic element to your presentation, but they should be used sparingly. Overusing them can distract your audience. Focus on subtle animations that enhance the flow of your presentation.

Some templates may have built-in animations, but many only include slide designs. It is important to preview your presentation and see where you should insert animations and transitions.

Advanced Tips for Using PowerPoint Templates

Advanced users can take their PowerPoint presentations to the next level by incorporating master slides, multimedia elements, and specialized add-ins. These advanced tips will help you enhance your presentations' functionality and visual appeal, ensuring a more engaging and professional result.

Using Master Slides

Master slides allow you to make universal changes to your presentation. By editing the master slide, you can adjust the design of all your slides simultaneously. This is useful for maintaining consistency and quickly making global changes.

Here's a quick guide on setting up and using Master Slides in PowerPoint:

  1. Open your PowerPoint presentation. Go to the "View" tab on the Ribbon and click "Slide Master" to enter the master slide view.

    Open Slide Master in PowerPoint


  2. In the left-hand pane, find the topmost slide, which is the master slide. Make changes to the master slide, such as adding a logo or changing fonts and colors. These changes will apply to all slides.

    PowerPoint Master Slides view


  3. Below the master slide, you'll see individual layout slides. You can customize these layout slides to modify specific slide types, such as title slides or content slides.
  4. Once you've made changes, click "Close Master View" in the "Slide Master" tab. Your changes will now be applied to all slides using modified layouts.

    PowerPoint close master slide view


  5. To use the updated layouts, go to the "Home" tab, click "Layout," and select from them to apply to specific slides in your presentation.

Incorporating Multimedia Elements

PowerPoint insert tab

Enhance your presentation by incorporating multimedia elements like videos, audio clips, and interactive charts. These elements can make your presentation more engaging and informative. You can find them in the "Insert" tab of the Ribbon and further customize them after adding them to a slide using special menus that appear upon selection.

Leveraging PowerPoint Add-Ins

PowerPoint add-ins are tools that can enhance the functionality of your presentations. Add-ins like "PowerPoint Labs" offer advanced features such as automated animations and enhanced design tools. Explore the available add-ins to find tools that can improve your presentation.

Conclusion

Using Microsoft PowerPoint templates can significantly enhance the quality and efficiency of your presentations. Whether you choose built-in templates, download them online, or purchase premium designs, templates provide a solid foundation for creating professional and engaging slides. Customizing templates to fit your needs and following best practices allows you to deliver presentations that leave a lasting impression.

Remember to consider your audience, maintain consistency, and practice your delivery. With these tips and resources, you'll be well-equipped to create stunning PowerPoint presentations that effectively communicate your message.

]]>
http://oktec.kr/?big=en-au/blogs/news/check-operating-system-version 2024-03-11T13:15:40-07:00 2024-03-11T13:15:40-07:00 Determine the Operating System of Your Computer With These Steps Sara Alsaqaf Knowing your computer’s operating system is important. Using these simple steps, you can easily find out much about your computer and be ready with the information should you ever need it.

More

]]>
The operating system of the computer is vital because this will help you make an informed decision when it comes to your computer. Knowing your computer’s operating system gives you an idea of what software you can install, and it can also help you synchronize all the applications within your computer. Another important function of the operating system is ensuring that all hardware like printers or disc drives and all applications are working properly.

The major classifications of operating systems are the 32-bit and a 64-bit processor. Before we go into the detailed steps on how to determine the operating system of your computer, let us first understand the difference between a 32-bit and a 64-bit processor.

There are several differences between a 32-bit and 64-bit operating processor, but the most significant ones are its memory capacity and its level of security. In comparison with the 32-bit processor, the 64-bit has more memory because the former only supports 4GB of RAM while the latter is capable of handling 16GB of RAM. Another difference is with its security features. The 64-bit version has added protective features on top of what a 32-bit version has. This is why there are many individuals who are already switching a 64-bit operating system.

Why Do You Need to Know About Your Operating System?

Besides just understanding what your computer is capable of and what it may or may not be compatible with, knowing your operating system and other vital information about your computer can come in handy if you have issues with software or hardware. Using these simple steps, you can easily find out much about your computer and be ready with the information should you ever need it.

How to Validate When Using Windows 10 Version

Below are some steps to determine whether your computer is using a 32-bit or 64- bit processor:

  1. Press Windows + I to open the settings application
  2. Select “System
  3. Click “About

You will see information which says, “System Type.” Here, you’ll find if you are using a 32-bit or 64-bit system, and it will also indicate if your processor is capable of a 64-bit.

Validate Windows 10 version

How to Check When Utilizing Windows 8 Version

If you are using Windows 8, there are two approaches that you can use to identify if you are using a 32-bit or 64-bit processor. If you fail to verify using one method, you can proceed to the next one.

1. Control Panel

The first method can be done by viewing the system window within the control panel.

  1. Drag the cursor to the lower portion of the screen, and click search
  2. In the search box, type in “System
  3. Select “Settings

If in the “System Field” it says 64-bit operating system it means that you have a 64-bit version of Windows 8. On the other hand, if it says 32-bit operating system then, you are using a 32-bit Windows 8 version.

2. System Information

The second method is by viewing the system information window.

  1. Drag the cursor to the lower portion of the screen and click “Search
  2. Type in “system information” in the search box
  3. Select “System Information
  4. Click “System Summary

If you are running a 64-bit processor, you will find the statement “x-64 based PC” in the section which says system type. Otherwise, this section will say “x-32 based PC” when the system is using a 32-bit.

Two Methods to Validate When Using Windows 7 or Vista

When using Windows 7 or Vista, you can check system window in the control panel by following these steps:

  1. In the “Start” search box, type “System
  2. You will see a program list. Select “System” again

The operating system will be indicated. The system type will say “64-bit operating system” if a 64-bit processor is used. When the system type says “32-bit operating system”, it means that a 32-bit version is used.

Find your Windows 7 version

You can also validate by viewing the system information window:

  1. Click “Start
  2. In the “Start” search box, type “System
  3. Select “System Information” in the program list
  4. Click “System Summary” in the navigation section

The operating system will then be displayed. If “x-64 based PC” appears, this means that a 64-bit version is utilized. If “x-32 based PC” appears, it means that a 32-bit version is used.

If you are using MS Office 2013 or newer versions, you can check the system type by doing the following:

  1. Start the Microsoft application
  2. Select the “File” tab
  3. Click “Help” found at the right side of the column
  4. Choose “About Microsoft” found at the right side of the column

Checking what operating system your computer will enable you to choose appropriate programs and applications to install on your PC. However, you should bear in mind that if you are using Windows 7 or Windows Vista with a 64-bit version, it does not always mean that your MS Office also has the same version. This is why you should always verify prior to doing any changes in your computer.

There are rare instances when you can’t validate the information you need even when accurately follow the steps provided. When you encounter this problem, it is best to get help from professionals who are experienced in dealing with these kinds of issues.

Why SoftwareKeep is the Right Place to Buy?

SoftwareKeep is a trusted software reseller and a Microsoft Certified Partner. We exist to make technology accessible by helping people like you choose the perfect product, get a great deal, and install it easily – so you can enjoy your software immediately.If you’re looking for genuine Microsoft software at the cheapest price – complete with 24/7 customer support and advice – you’re in the right place.

]]>
http://oktec.kr/?big=en-au/blogs/news/how-to-reinstall-microsoft-office-on-pc 2024-03-11T13:14:26-07:00 2024-03-11T13:14:26-07:00 How to Reinstall Office 2016 or Office 365 on Your PC Sara Alsaqaf More

]]>
Once you’ve started using the latest editions of the Microsoft Office suite Office 2016 or Office 365 on your PC, the software often becomes crucial to your work. With a vast number of improvements and additions, Office 2016 has continued the tradition of Microsoft’s dominance as the go-to product for your program needs, whether those are business-related, study, or just organizing your personal affairs.

When you purchase any product like Microsoft Office from SoftwareKeep, you will receive free assistance from our experts to help you get your Office suite back up and running. Below are some helpful instructions to help you get back to work in no time at all.

Check whether your Office edition is for Home or Business

The instructions are different depending on which version of Office you have. If you have the Student edition or Home edition, then you need one set, whereas all of the Business suites have separate instructions. Thankfully, this is not true for 2016 and 365. Regardless of which version of you have between those two, the instructions are the same.

The versions of Office that are considered “Home” suites include:

  • Office 365 Home
  • Office 365 Personal
  • Office 365 University
  • Office 2016 Home & Student
  • Office 2016 Home & Business
  • Office 2016 Professional
  • Office 2016 Professional Plus

The versions of Office that are considered Business suites include:

  • Office 365 Business/Business Premium
  • Office 365 Education E5
  • Office 365 ProPlus
  • Office 365 Enterprise E3/E4/E5
  • Office 365 Nonprofit Business Premium/E3/E5
  • Office 365 U.S. Government Community G3/G5
  • Project Online Professional/Premium
  • Office 2016 Professional Plus
  • Visio Pro for Office 365
  • Office 365 Business Essentials
  • Office 365 Enterprise E1
  • Office 365 Education
  • Office 365 Nonprofit Business Essentials/E1
  • Office 365 U.S. Government G1
  • Project Online Essentials

Once you have determined which version of Office you have, simply continue to the correct set of instructions for reinstallation.

Find out if it’s better to download the 32-bit or 64-bit version of Office

You can get Office 2016 and 365 in either a 32-bit or 64-bit version. The default is the 32-bit version, and this should be the correct choice for you if you are doing basic work in Office. The 64-bit version requires more memory and processing power. It is generally reserved for those who intend to work on very large projects such as:

  • Large and extensive databases with very complex calculations
  • Extremely large pictures, videos, and animation in PowerPoint
  • Files over 2GB in size in Projects
  • In-house Office customizations

How to reinstall Office 365

Step 1. Find your product key

Product key

While mainstream support for the OS ended in 2015, Microsoft is still offering updates to Windows 7 and will continue to do so through 2020. These include critical security updates. So, there’s no reason to quit using the OS now if it fits your needs.

Step 2. Redeem your product key

If you’ve already redeemed your product key, you can skip this step.

If you didn’t redeem your product key when you first bought Office, go to www.setup.office.com and sign in with any version of a Microsoft account (Hotmail, Outlook, X Box, etc.). If you don’t have a Microsoft account, sign up for one now.

When prompted, insert your 16-digit code. The cursor should move along with your typing, so there’s no need to click on individual boxes.

Step 3. Go to the Office main page

Microsoft sign-in

Go to www.office.com/myaccount. If you haven’t yet signed in to your Microsoft account, do so now. Make sure this is the account on which your redeemed product key will show up. If you are logged in with a different account, log out and log back in with the correct account.

Step 4. Choose either the 32-bit or 64-bit version

If you choose the 32-bit version, simply download it by clicking Install. If you select the 64-bit version, choose your preferred language and then select the 64-bit option before clicking Install.

Step 5. Install Office

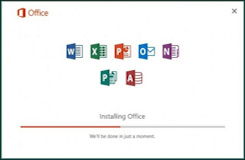
Install Microsoft Office

Open the file you’ve downloaded in your browser. If you are prompted with the question “Do you want to allow this app to make changes to your device?”, click Yes.

The installation process should then be automatic.

Step 6. Activate Office

Follow the prompts to find the new programs in your start menu. At this point, you will either be prompted to agree to the Microsoft License Agreement or else you may be prompted to activate the product. If so, just follow the prompts.

Reinstall steps for Business

Step 1. Sign in with your account

Make sure this is the business account where the product is registered.

Step 2. Choose either the 32-bit or 64-bit version

The 32-bit will be the default. Go to advanced settings for the 64-bit version. Regardless, after you’ve made your decision, click Install to begin the process.

Step 3. Go to the Office main page

Office installer

Open the file you’ve downloaded in your browser. If you are prompted with the question Do you want to allow this app to make changes to your device?, click Yes.

The installation process should then be automatic.

Step 4. Activate Office

You may be prompted either to accept the Microsoft License Agreement or, rarely to activate the product. If it is the latter, simply follow the prompts.

Choose SoftwareKeep for your Office needs

Regardless of which version of Office you need now or in the future, SoftwareKeep is the best place to purchase Office and other software products. Not only do we offer the lowest prices anywhere on the web on all of our products, guaranteed, we also provide expert assistance in choosing your programs and troubleshooting any problems you have along the way.

Buying Office from SoftwareKeep means never having to worry about download or reinstall issues. We work with you to make sure your programs work to their optimal level. Visit our website at SoftwareKeep today or contact us to find out more.

]]>
http://oktec.kr/?big=en-au/blogs/news/how-to-setup-and-install-windows-10-via-bootable-media 2024-03-11T13:14:01-07:00 2024-03-11T13:14:01-07:00 How to Setup and Install Windows 10 Via Bootable Media Sara Alsaqaf If you are looking to perform a clean install on a new machine without a current OS or if something goes wrong with your initial installation, we have provided the following instructions to do so through a bootable disc (otherwise known as a boot drive).

More

]]>
Microsoft Windows 10 is a dynamic operating system that is vastly improved over other versions. It is equally usable on a laptop, tablet, or conventional desktop, with the dependability of older versions of the operating system coupled with forward-looking advancements. If you are looking to download Windows 10 and save big on your purchase, turn to the software experts at SoftwareKeep for the lowest prices, free-shipping, and the best customer service and support before, during, and after the sale.

Microsoft’s latest software offering comes with many sought-after improvements and you have several different options when it comes to installing the software if you have purchased the upgrade. If you are looking to perform a clean install on a new machine without a current OS or if something goes wrong with your initial installation, we have provided the following instructions to do so through a bootable disc (otherwise known as a boot drive).

The first item you will need is a USB flash drive, and you will want to create bootable USB media from ISO for Windows 10, and will have to set your computer’s settings to boot from a USB device.

Installation 1: From ISO or USB

Step 1.

Open the Media Creation Tool from the USB device and click “Run.”

Step 2.

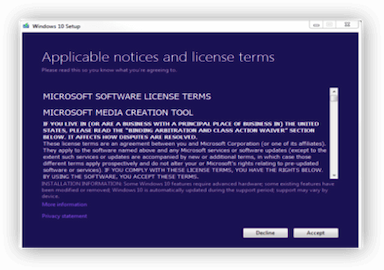
Windows 10 license terms

Click on the “Accept” button on the lower right-hand corner to accept the license terms. (This must be done to install the software, per the developer).

Step 3.

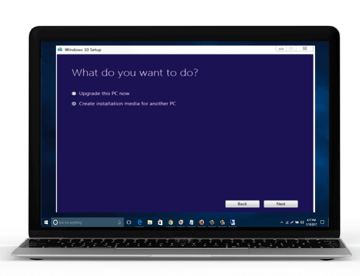
Create installation media for another PC

You will be presented with two clickable options. Select the option “Create installation media for another PC, and click on the “Next” button.

Step 4.

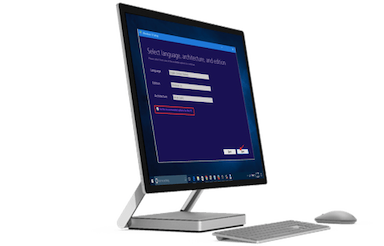
Customize Windows 10 installation

You again have two options to choose from. You can either select your language, software edition (Windows 10, in this case) and either 32 or 64-bit. It is recommended that you try 64-bit first if you aren’t sure which option you should select.

You can also simply check the box “Use the recommended options for this PC” and let the tool automatically configure it for you.

Step 5.

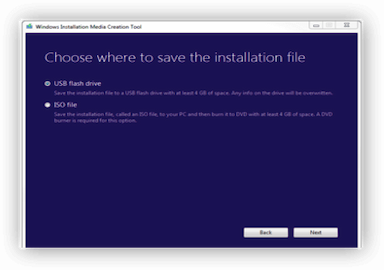
Install Windows 10 from USB Flash Drive or ISO File

Select USB Flash Drive or ISO File.

  • If you select USB: Wait until the file is downloaded and insert your USB device into your computer. It is important to note that this will wipe all of the existing data on your USB device, so make sure that any information that you want to keep is stored elsewhere!
  • If you selected ISO: Wait for the file to download and insert a disc when prompted by the application.

Changing BIOS to Boot from USB / CD-DVD Media Boot File

In order to start from bootable media that you have created, you might need to change your Basic Input/Output System or BIOS. Here are the steps to do so:

Step 1.

To enter your computer’s BIOS, you must first start your computer. When you are prompted, press Del, Esc, F2, F10, or F9 to enter the system’s BIOS. Usually, you will find the key to enter the BIOS on the screen.

Step 2.

Find and select the Boot Options menu.

Step 3.

Select the correct Boot Media device that you are using (USB, CD/DVD ROM drive) as the first boot device on your computer, and save the setting changes.

Step 4.

Turn your computer off.

Step 5.

Insert the USB or CD/DVD boot media.

Step 6.

Start your computer again to this time boot from the drive you selected.

Installation 2: Installing Windows 10 from Bootable Media

Step 1.

Insert the drive (USB or CD/DVD) Windows Installation Setup boot media

Step 2.

To start the setup process, you must turn on your computer.

Step 3.

Use Windows Installation Setup boot media

A message prompting you to press a key to boot from the device should appear. Press a key to force your computer to use Windows Installation Setup boot media upon starting.

Step 4.

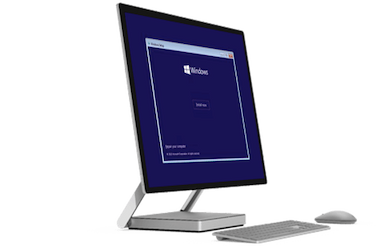
Windows Setup Options

Windows Setup will load and you will see the Setup window on your screen. You will be given your Windows Setup Options and will be able to Select Your Regional Settings. This will configure your preferred language, time, currency format, and keyboard type.

Step 5.

Install Windows 10

Click the button to “Install Now”.

Step 6.

Enter Windows 10 product key

You will be prompted to enter your Windows Product Key:

  • If you ordered your software online, this key will typically be on your online order form or in your confirmation email after purchase.
  • If you purchased a physical copy, the product key will be included in the packaging.

Once you have located and entered the key, click Next.

Step 7.

Windows license terms

Accept the License Terms. It is recommended that you read the terms of the software license before agreeing to them. You can select the box stating “I accept the license terms” and can then click Next.

Step 8.

Select Custom Installation.

Step 9.

Windows 10 hard drive and partition manager

Choose which hard drive and partition you would like to install Windows on. You can also choose to Delete All Partitions so that Windows Install will install the OS on the hard drive that you have selected.

Warning: if you delete all partitions, all of the data on the hard drive (software, applications, and files) will be destroyed, so make sure to back everything up that you want to keep!

Install Windows on your chosen hard drive or partition. Click the Next button and the installation should begin.

Step 10.

Personalize your Windows 10 settings

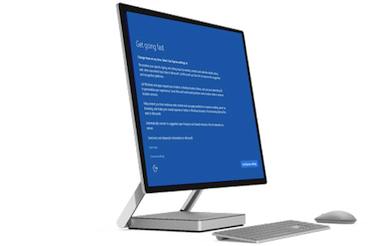
You will be prompted to personalize your settings, including preferred browser, connectivity, error reporting, and security. You can choose to customize these settings yourself, or can click Use Express Settings to customize.

Step 11.

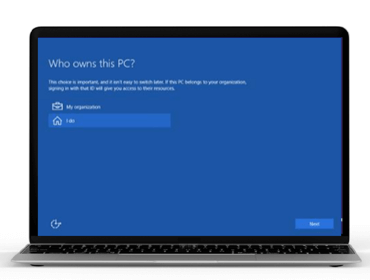
Sign into Windows 10

Identify who owns the device. You will be asked “Who Owns this PC?” and you can sign in with your personal or company ID (which will let you access the company’s resources, if using Windows 10 for work).

Step 12.

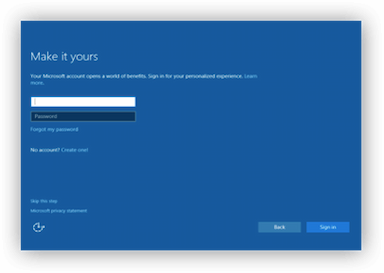
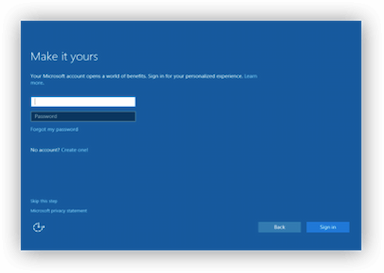
Sign in with Microsoft account

Use your Microsoft account to log into Windows 10. This will allow you to take advantage of Microsoft’s suite of applications (which they highly recommend) including Skype, Office, Outlook.com, OneDrive, or Xbox.

Once installation has been completed, you can remove the Windows Install media and can click Finish/Restart to restart your computer and run your new Windows 10 Operating System!

Why Choose SoftwareKeep for your Windows 10 Software?

If you are looking to purchase the software you need a a price you can afford, look no further than SoftwareKeep. In addition to our highly-competitive prices, we offer exceptional customer service to ensure that you are satisfied with your purchase and are able to install and run the software that you purchased. We are here for you every step of the way, from sales to installation to support!

To find out more about the products we sell and how we can help you, visit our website at SoftwareKeep today or contact us to find out more.

]]>
http://oktec.kr/?big=en-au/blogs/news/5-steps-to-upgrade-your-windows-7-to-windows-10-using-a-product-key 2024-03-11T13:13:46-07:00 2024-03-11T13:13:46-07:00 5 Steps to Upgrade Your Windows 7 to Windows 10 Using a Product Key Sara Alsaqaf You can use your Windows 7 product key to begin updating to Windows 10. Check out the step-by-step guide to updating your Windows 7 to Windows 10.

More

]]>
Windows 10 was released on July 29, 2015. Microsoft describes this operating system as a “universal app” because you can install it on multiple devices, such as PCs, tablets, smartphones and more. It comes with a combination of Windows 7’s start menu and Windows 8’s tile features.

Last year, Microsoft had a promo wherein Windows 7 users could upgrade their devices to Windows 10 for free. However, upgrading to Windows 10 was hard because you could not use the Windows 7 product keys right away. You had to update your system and then validate the upgrade before making a clean installation with ISOs and upgrade media.

The purpose of this process was to ensure that your device had Digital Entitlement. That way, you could make a fresh install from the same device. However, Microsoft has changed the upgrade process. You do not need to perform the task mentioned above and get Digital Entitlement. You can use your Windows 7 product keys to begin updating. However, you still need to do the clean install before upgrading your operating system.

Product Keys

Before we discuss how to upgrade your Windows 7 laptops to Windows 10, you need to know what product keys are. A product key is a combination of numbers and letters of any length that software needs during installation. Its purpose is to help manufacturers verify that the software copy was legally bought. Product keys are like passwords. You cannot use a particular program if you do not have it. Otherwise, the program will run, but you can only use the full version as a trial. Product keys have restrictions.

For example, you can use this key per person and per program. However, some product keys can be utilized by many people. However, you cannot use the same key at the same time. Now that you know what a product key is, it is time to discuss the step-by-step guide to updating your Windows 7 to Windows 10. To do this, you need to perform the following tasks:

Step 1. Find Where Your Windows 7 Product Key Is and Grab It

You are lucky if you locate the key in your gadget. However, if you do not know where it is, you may need to use a program that finds the device’s product key.

Step 2. Make Sure to Back Up Your Files Before Proceeding

Backup your files

Even if you are just planning to upgrade your PC, it is important to have another copy of your records. Who knows, something can go wrong while installing the operating system. If you encounter a problem while installing the new operating system, you will not have to reproduce all those files because you have a backup.

Step 3. Make Windows 10 Installation Media if You Do Not Have It

Create Windows installation media

Use the Media Creation Tool and choose “Create installation media for another PC.” A page will pop up, which allows you to choose whether you want to burn a bootable DVD or create a bootable flash drive.

Step 4. Install the Media on the Computer and Install Windows 10

Windows 10 installer

Before installing Windows 10, the device will give you a review of your choice and what will be saved through your upgrade. You can choose the “Keep personal files and apps” or “Keep personal files only” to save all valuable data. However, if you want a clean installation, choose “Nothing.”

Step 5. Provide Your Product Key

Windows 10 product key

There are two ways to enter the product key. It depends on when the software will ask for it. There are cases wherein the computer requests the key during installation. If so, you need to enter the code in the space provided and click on the Next button to continue the installation.

However, if your device does not ask for it during the installation of Windows 10, you need to take note of the following steps:

  1. Go to Settings and then Update & Security. Head to Activation to see your digital license.
  2. Select “Change product key” and enter the code.
  3. The system will check in with the servers of Microsoft.
  4. Once they key is verified, click on the Next button to complete the activation procedure.
  5. When the activation process is complete, click on the Close button and enjoy using your newly installed Windows 10.

As you can see, upgrading your Windows 7 to Windows 10 is easy. You just need to follow these steps to get the latest operating system. You can repeat the same procedure and use the same Windows 7 key if you want to reinstall Windows 10. That is because this key is already linked with the digital license, which allows you to reinstall the system, even if Microsoft cancels this method of getting Windows 10.

You can also log in to your computer using your Microsoft email account, and your Windows 7 product key will also be associated with your account. That way, you can reactivate your license if you want to reinstall Windows 10 again.

If you lose your product key, or if you purchase software from a shady source that could be selling bootlegged software, a product key may not be available or the product key might come back as invalid. Even if you have purchased your software legitimately, you can run into issues that can give you headaches if you don’t have the product key available during installation. Should you ever uninstall your software and then try to install it again without a valid product key, you will spend a lot of time with Microsoft teh support trying to get your Microsoft Office authorized.

Why SoftwareKeep is the Right Place to Buy?

At SoftwareKeep, we are always here to help. We are a Certified Microsoft Reseller and only sell genuine Microsoft products. You will always be notified of your product key and licensing information. We pride ourselves on bringing you the best software at the lowest prices, and we offer around the clock customer support and tech service to ensure you purchase the right software and get it installed and implemented appropriately. When you need software, trust SoftwareKeep to be there for you.

]]>
http://oktec.kr/?big=en-au/blogs/news/how-to-start-windows-10-in-safe-mode 2024-03-08T05:51:02-08:00 2024-03-08T05:51:02-08:00 How to Start Windows 10 in Safe Mode? Sara Alsaqaf There are plenty of ways to enter Safe Mode in Windows 10. Whether you need to troubleshoot a problem or want to increase your boot speed, it's useful to learn how to boot Windows 10 in Safe Mode.

More

]]>
Safe Mode is a useful trick when you have minor bugs in your Windows operating system. However, with the increased speed of Windows 10 booting, the old system to use Safe Mode has been abandoned (because you just wouldn’t have time to do it before your computer reloaded everything). There are still plenty of ways to enter Safe Mode, however. Use any of the following to boot in Safe Mode when you next need to.

Buy and download Windows

Use the System Configuration tool

This is one of the easiest methods to reboot in Safe Mode. Simply hit the Windows key + R, then type in msconfig into the box that pops up. That should bring up the System Configuration menu. Go to the Boot tab at the top. Choose to reboot in Safe Mode, then click OK. At that point, Windows will ask if you want to restart now or exit without restarting. If you still have work to save, exit without restarting. Otherwise, restart.

Shift + Restart

Another simple method. Click on the Start button, and then click on the power button. Now, while holding the shift key, click restart. When Windows reboots, it will ask if you want to troubleshoot or return to Windows 10. Choose to troubleshoot. On the next screen, choose Advanced options. On the next screen, choose Startup Settings. At this point, Windows will tell you what your restart options are. Click restart. After Windows 10 reboots, choosing the Safe Mode option you prefer. With F4, you simply enable Safe Mode. With F5, you get Safe Mode with Networking. And, F6, you get Safe mode with Command Prompt. Choose the version that works best for your needs.

The Recovery Option

Hit the Windows key + I and go to your Settings. Then, go to Update & security. When you open that, click on Recovery. Under Advanced startup, click Restart now. When the computer restarts, follow the steps in the Shift + Restart topic to get to the Safe Mode options.

Interrupt the Normal Booting Process

Somewhat similar to the old Safe Mode tricks, you can convince your computer while it boots to enter Safe Mode by interrupting the boot process. While your computer is booting, hit the reset or power button. Do this four times in a row, and you’ll see that Windows is Preparing Automatic Repair. When that loads, go to Advanced options instead of Restart. This will take you to the same troubleshooting page in Shift + Restart, and you can follow the same instructions.

Get all your troubleshooting questions answered by SoftwareKeep

Whether your issues involving booting in Safe Mode or are completely unrelated, you need a place where you can go with all your troubleshooting needs. Thankfully, SoftwareKeep offers the best expert assistance on the web for all your software concerns. On top of that, we also have the guaranteed lowest prices for all your new software needs.

Whether you’re looking to resolve a computer issue or buy the latest software, visit our website at SoftwareKeep today or contact us to find out more.

]]>
http://oktec.kr/?big=en-au/blogs/news/how-to-add-youtube-video-to-powerpoint 2020-06-22T16:20:00-07:00 2024-03-19T01:56:13-07:00 How to Add YouTube Video to PowerPoint Rick Akura More

]]>
When making presentations, the goal is to grab your audience's attention while delivering information and ideas in an engaging manner. While many people feel content using static, silent slides is boring, it’s often a good idea to throw in a video or two when creating presentations in Microsoft PowerPoint.

As your presentations need to be accessible, it’s a good idea to insert videos from the internet instead of uploading them yourself. Uploading a video from your computer can drastically increase the file size of your presentation, which is a definite setback unless you need or prefer offline playback.

However, it’s not entirely clear from the get-go how you can insert videos from websites such as YouTube when working with Microsoft PowerPoint. In this article, we’ll show you multiple ways that make it simple to embed any video from the popular video-sharing site.

Jump To:

  1. How to Embed a video into PowerPoint
  2. Method 1: Use PowerPoint’s “Search YouTube” feature
  3. Method 2: Copy and paste the embed code from YouTube
  4. Method 3. Link your video and open in a web browser
  5. Method 4. Download and insert the YouTube video
  6. Method 5. Insert a YouTube video on Mac

Embed a video into PowerPoint

There are different ways to insert YouTube videos into your presentation. All of these methods work for different purposes — find the one most convenient for you below.

Method 1: Use PowerPoint’s “Search YouTube” feature

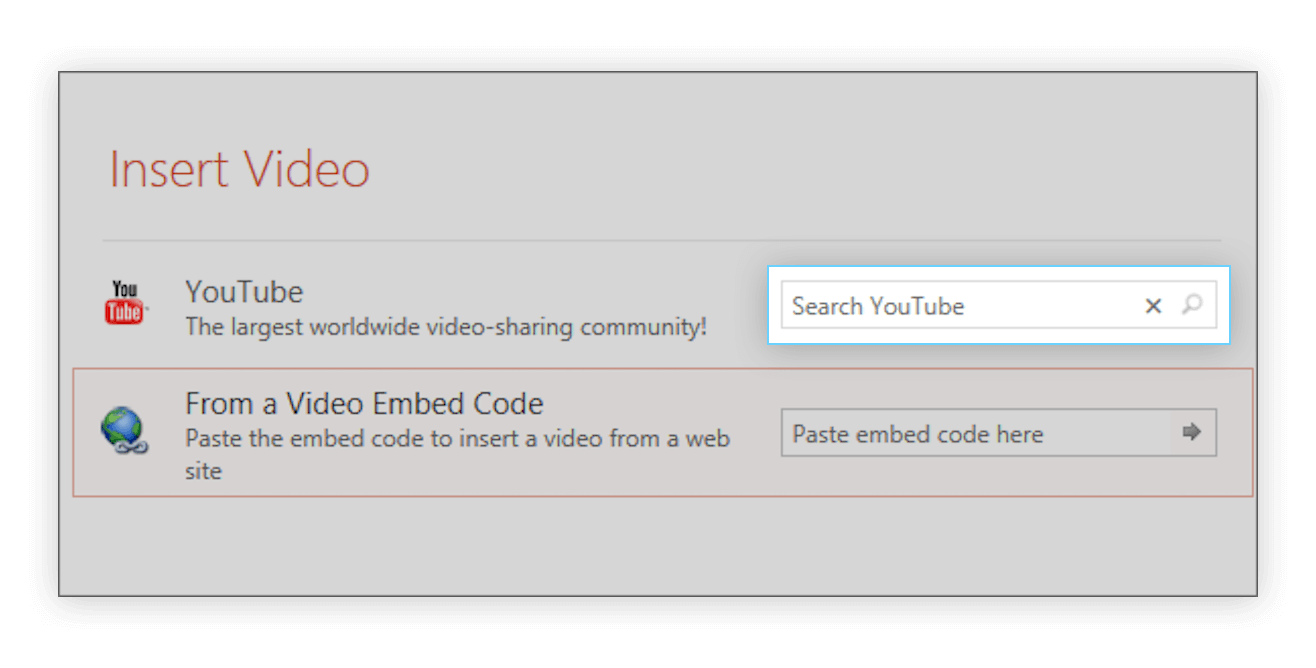
how to add a YouTube video to PowerPoint

As the use of YouTube videos has grown over the years, Microsoft has implemented a feature that allows you to search YouTube without having to leave PowerPoint itself. This doesn’t only make it simple to add a video to your slide but speeds up your workflow as there’s no need to juggle multiple windows at once.

Note: If you want your video to play inside your presentation, you’ll need a working connection to the internet when presenting. If you want to know how to add a YouTube video to your presentation with offline playback, skip to Method 4.

Here’s how to use the “Search YouTube” feature and add a YouTube video to your presentation.

  1. Click on the slide you want to add a video to, then open the Insert tab located in the ribbon on top of your screen.
  2. Click on the Video icon within the Media section on the far right of the ribbon, then select the Online Video… option from the drop-down menu.
  3. In the Insert Video window, type your search query into the Search YouTube field and hit the Enter key. This is automatically going to show you the top results.
  4. Select any videos you want to add to your slide and click on the Insert button.
  5. Once the video is inserted, you can move it, resize it, and edit its attributes, such as transitions and animations. To preview your video, simply right-click on it and select the Preview option.

Method 2: Copy and paste the embed code from YouTube

How to embed YouTube Video to PowerPoint

Every YouTube video has a unique embed code that you can use to put the video on different platforms, such as websites or even PowerPoint presentations. Using this code, you can quickly include a needed video in the slide you’re working on.

Here are the steps to obtain a YouTube video’s embed code and use it to add the video to your PowerPoint presentation.

  1. Open the video on YouTube.
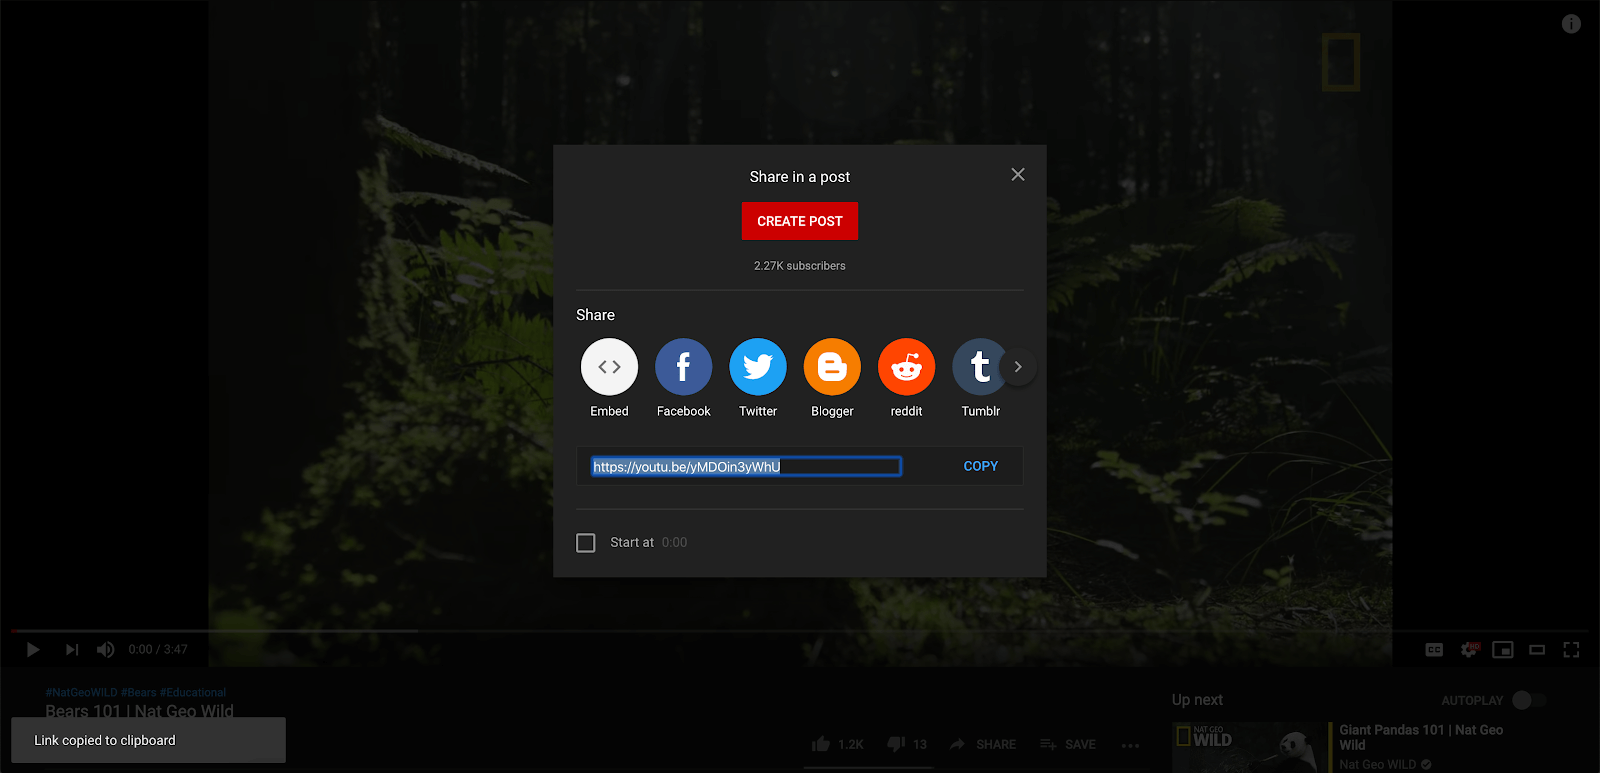
  2. Click on the Share icon, then click the Embed icon in the new tab that opened up. This is going to redirect you to the embedded code of the video.
  3. Customize any settings, such as the visibility of player controls and privacy-enhanced mode, before copying the code.
  4. Click inside the box under Embed Video to select the code, then right-click and choose Copy.
  5. Open PowerPoint and select the slide you want to add your video to. 
  6. Click on the Insert tab in the ribbon and click on Video (Media section). Select the Online Video… option from the drop-down menu.
  7. Right-click inside the Paste embed code here field and select Paste. This will put the code you just got into the box.
  8. Press Enter to embed the YouTube video. Once the video is embedded, you can move it, resize it, and edit its attributes, such as transitions and animations.

Method 3. Link your video and open in a web browser

How to link a Youtube Video to open on a web browser in PowerPoint

If you’re not looking to play your video straight from PowerPoint, you can use a link to embed your video and open it inside a web browser. This is a very simple solution if you want to narrate a video or simply don’t require any other information to be shown on the screen while the video is playing in fullscreen.

Note: If you want your video to play in a web browser after being clicked on in your presentation, you’ll need a working connection to the internet when presenting. If you want to know how to add a YouTube video to your presentation with offline playback, skip to Method 4.

Here’s how to link your video in PowerPoint and open it in a browser.

  1. First, we recommend you link the video to an image for easier access. Simply take a screenshot from the video or insert a picture from the internet.
  2. Once your image is saved on your device, click the Insert tab in the ribbon and select Pictures. Navigate to where you saved your image and select it, then click Insert.
  3. Select your image and click the arrow next to the Link item in the side menu. Now, click on the Insert link option.
  4. Go back on YouTube and click on the Share icon. You can see a short link at the bottom of the tab. Click on the Copy button next to it to automatically copy the video’s individual link to your clipboard.
  5. In PowerPoint, paste the link into the Address box by right-clicking and selecting Paste (or using the Ctrl + V shortcut), then click Insert Hyperlink.
  6. Now that you linked your video, as soon as you reach the slide in PowerPoint, you can easily play the video in a web browser as long as you’re connected to the internet.

Method 4. Download and insert the YouTube video

For those looking to play videos offline, downloading and inserting the desired video from your computer is a reliable option. Here are all the steps you need to take to obtain a YouTube video easily and add it to your presentation without needing any internet when holding your presentation.

  1. On YouTube, click on the Share icon. You can see a short link at the bottom of the tab.
  2. Click on the Copy button next to the link to automatically copy the video’s individual link to your clipboard.
  3. Navigate to a free YouTube downloader website such as (www.y2mate.com), and insert the link into the input field, then click Download. Follow the instructions on the website to get the desired resolution.
  4. Open PowerPoint and select the slide you want to add your video to. 
  5. Click on the Insert tab in the ribbon and click on Video (Media section). Select the Video on my PC… option from the drop-down menu.
  6. Navigate to where you saved your image and select it, then click Insert.
  7. Once the video is embedded, you can move it, resize it, and edit its attributes, such as transitions and animations. Note that using this method, you won’t have access to playback configuration.

Method 5. Insert a YouTube video on Mac

How to insert YouTube Video to PowerPoint on Mac

At the time of writing, there’s only one method to insert videos on Mac operating systems. This makes the process more streamlined, allowing users to easily memorize the process and utilize it quickly in future projects.

Here’s how to insert a video into PowerPoint on a Mac device.

  1. On YouTube, click on the Share icon. You can see a short link at the bottom of the tab.
  2. Click on the Copy button next to the link to automatically copy the video’s individual link to your clipboard.
  3. Click on the slide you want to add a video to, then open the Insert tab located in the ribbon on top of your screen.
  4. Click on the Video icon within the Media section on the far right of the ribbon, then select the Online Movie… option from the drop-down menu.
  5. Paste the link into the box that appears on the screen by right-clicking and selecting Paste or using the Command + V shortcut. Hit the Insert button to finish adding your video.
  6. Once the video is embedded, you can move it, resize it, and edit its attributes, such as transitions and animations. Note that using this method, you won’t have access to playback configuration.

Watch YouTube Video: How to add Background Music for all slides in PowerPoint 

In this video, you'll also learn how to add background music for all slides in PowerPoint, which you can do in your studio very easily: 

Keep Learning

» How to Reduce the File Size of a PowerPoint Presentation
» 
Top 10 PowerPoint Tips and Hacks You Need to Know
» PowerPoint Design Ideas Tool and How to Use it
» Microsoft Office PowerPoint cheat sheet
» How to add a gif in PowerPoint

]]>