Enabling automatic log in can make your computer usage more efficient, especially if you're the only one using the device. However, weighing the convenience against the potential security risks is important. By the end of this article, you'll clearly understand how to set up automatic login and the considerations to keep in mind to maintain your system's security.
In this guide, we cover everything you need to know about setting up automatic login for Windows 10 and Windows 11, from the initial setup to troubleshooting, ensuring a seamless experience.
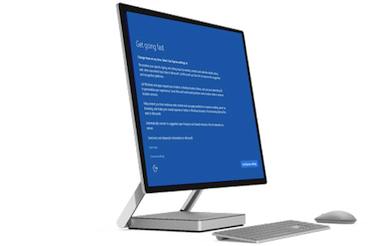
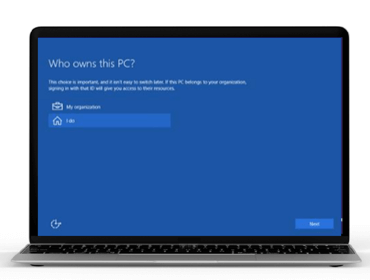
Automatic login in Windows is a feature that allows your computer to bypass the login screen and directly boot to your desktop or start screen. As you turn on or restart your computer, you won't need to enter your username and password to access your account manually. Instead, Windows will automatically log in to a pre-selected user account.
While automatic login offers significant convenience, its potential as a security risk shouldn't be addressed, especially if your computer is in a shared or public environment.
Before we dive into the setup process, let's discuss why you might want to enable automatic login. This feature can be particularly beneficial for:
However, it's essential to remember that automatic login bypasses the password requirement, which could pose a security risk if multiple people use your computer or are in a public area.
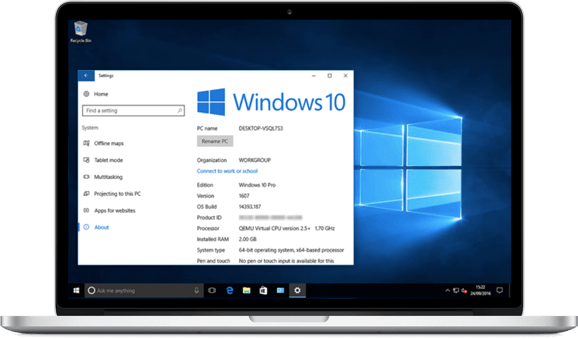
Setting up automatic login in Windows 10 is straightforward. Follow these steps:
Your computer should now log in automatically to the selected account without prompting for a password.
Windows 11 has a slightly different interface, but the process for setting up automatic login is similar. Here's how:
Your computer should log in automatically to the selected account.
While setting up automatic login is generally straightforward, you might encounter some login issues. Here are a few common problems and how to fix them:
If automatic login isn't working, double-check that you've entered the correct password and that the "Users must enter a username and password to use this computer" option is unchecked.
Ensure that no group policies are overriding your settings. You can check this by opening the Group Policy Editor (gpedit.msc) and navigating to Computer Configuration -> Administrative Templates -> System -> Logon. Make sure the policy "Always use classic logon" is not enabled.
If you're worried about security, consider setting up a PIN or biometric login for added protection while still enjoying the convenience of automatic login. Windows Hello can be a great alternative, offering security and ease of access.
If you're concerned about security but still want a quick login process, consider these alternatives:
Windows Hello is a biometric authentication feature in Windows 10 and Windows 11 that allows users to log in using facial recognition, fingerprint scanning, or a PIN. This provides a more secure and convenient alternative to traditional passwords.
Before enabling Windows Hello, ensure your device supports it. Modern laptops and PCs with built-in cameras or fingerprint readers support Windows Hello. You can purchase compatible external hardware if your device doesn’t have these features.
Here’s a step-by-step guide on how to enable Windows Hello on your device:
Fast user switching allows multiple users to log in to a computer without logging out the current user. It's a good compromise between security and convenience.
Sleep mode is a power-saving state that allows users to quickly resume their work without going through a full startup process, making it a convenient alternative to system shutdown. Sleep mode saves the current state in RAM, enabling instant resumption of activities providing speed, energy efficiency, and security while maintaining user session while consuming minimal power.
Automatic login can significantly enhance your computing experience by saving time and simplifying access to your desktop. However, it's crucial to weigh the convenience against potential security risks.
Following the steps outlined in this guide, you can easily set up automatic login on your Windows 10 or Windows 11 device and enjoy a more streamlined workflow. Remember to implement additional security measures to protect your data and maintain the integrity of your system.
With this comprehensive guide, you can now enable automatic login on your Windows device.
]]>Whether you're a beginner or an experienced user, templates make a significant difference in the quality of your work. From finding free and paid templates online to utilizing the ones included in PowerPoint, you'll discover various options to elevate your presentations, empowering you with new tools and exciting possibilities.
Let's explore the world of PowerPoint templates, which can help you make a lasting impression with your slides.
PowerPoint templates are pre-designed slide layouts that you can use as a starting point for your presentations. They come with various design elements like backgrounds, fonts, colors, and graphics that help create a cohesive look. Templates save time and ensure that your presentation maintains a professional appearance throughout.
PowerPoint templates come in a wide array of styles and formats, catering to different needs and professions. The diversity is exciting, offering a range of options to explore and experiment with. Here are five common types of templates:
Using PowerPoint templates offers several advantages. They provide a consistent design, crucial for maintaining a professional image. More importantly, they save time, allowing you to focus on the content of your presentation. Templates also inspire creativity by offering new design ideas and layouts you might not have considered.
One of the easiest ways to get started with PowerPoint templates is to use the ones included in the software. Microsoft PowerPoint comes with various built-in templates covering a range of topics and purposes. To access these templates:
The internet is a treasure trove of PowerPoint templates. You can find free and paid options catering to various industries and presentation types. Some popular websites to download PowerPoint templates include:
Third-party templates can significantly expand your design options. Professional designers often create templates you can customize to fit your presentation's needs. To use third-party templates:
Free PowerPoint templates are widely available and can be a great starting point for beginners. They offer a variety of designs and can be used for personal or professional presentations. However, free templates might have design quality and customization options limitations.
On the other hand, paid templates typically offer higher-quality designs and more advanced features. Professional designers create them, and they can be more versatile and customizable. Investing in paid templates can be worthwhile if you frequently create presentations and need various design options.
Using PowerPoint templates effectively goes beyond simply downloading and importing a template. Customizing templates to fit your content and maintaining a consistent design throughout are important to get the most out of a PowerPoint template.
Customizing templates is essential to make your presentation unique and tailored to your audience. Here are some customization tips:
Consistency in design is crucial for creating a professional presentation. To maintain a cohesive and polished look, stick to a uniform color scheme, font style, and layout throughout your slides.
Animations and transitions can add a dynamic element to your presentation, but they should be used sparingly. Overusing them can distract your audience. Focus on subtle animations that enhance the flow of your presentation.
Some templates may have built-in animations, but many only include slide designs. It is important to preview your presentation and see where you should insert animations and transitions.
Advanced users can take their PowerPoint presentations to the next level by incorporating master slides, multimedia elements, and specialized add-ins. These advanced tips will help you enhance your presentations' functionality and visual appeal, ensuring a more engaging and professional result.
Master slides allow you to make universal changes to your presentation. By editing the master slide, you can adjust the design of all your slides simultaneously. This is useful for maintaining consistency and quickly making global changes.
Here's a quick guide on setting up and using Master Slides in PowerPoint:
Enhance your presentation by incorporating multimedia elements like videos, audio clips, and interactive charts. These elements can make your presentation more engaging and informative. You can find them in the "Insert" tab of the Ribbon and further customize them after adding them to a slide using special menus that appear upon selection.
PowerPoint add-ins are tools that can enhance the functionality of your presentations. Add-ins like "PowerPoint Labs" offer advanced features such as automated animations and enhanced design tools. Explore the available add-ins to find tools that can improve your presentation.
Using Microsoft PowerPoint templates can significantly enhance the quality and efficiency of your presentations. Whether you choose built-in templates, download them online, or purchase premium designs, templates provide a solid foundation for creating professional and engaging slides. Customizing templates to fit your needs and following best practices allows you to deliver presentations that leave a lasting impression.
Remember to consider your audience, maintain consistency, and practice your delivery. With these tips and resources, you'll be well-equipped to create stunning PowerPoint presentations that effectively communicate your message.
]]>The major classifications of operating systems are the 32-bit and a 64-bit processor. Before we go into the detailed steps on how to determine the operating system of your computer, let us first understand the difference between a 32-bit and a 64-bit processor.
There are several differences between a 32-bit and 64-bit operating processor, but the most significant ones are its memory capacity and its level of security. In comparison with the 32-bit processor, the 64-bit has more memory because the former only supports 4GB of RAM while the latter is capable of handling 16GB of RAM. Another difference is with its security features. The 64-bit version has added protective features on top of what a 32-bit version has. This is why there are many individuals who are already switching a 64-bit operating system.
Besides just understanding what your computer is capable of and what it may or may not be compatible with, knowing your operating system and other vital information about your computer can come in handy if you have issues with software or hardware. Using these simple steps, you can easily find out much about your computer and be ready with the information should you ever need it.
Below are some steps to determine whether your computer is using a 32-bit or 64- bit processor:
You will see information which says, “System Type.” Here, you’ll find if you are using a 32-bit or 64-bit system, and it will also indicate if your processor is capable of a 64-bit.
If you are using Windows 8, there are two approaches that you can use to identify if you are using a 32-bit or 64-bit processor. If you fail to verify using one method, you can proceed to the next one.
The first method can be done by viewing the system window within the control panel.
If in the “System Field” it says 64-bit operating system it means that you have a 64-bit version of Windows 8. On the other hand, if it says 32-bit operating system then, you are using a 32-bit Windows 8 version.
The second method is by viewing the system information window.
If you are running a 64-bit processor, you will find the statement “x-64 based PC” in the section which says system type. Otherwise, this section will say “x-32 based PC” when the system is using a 32-bit.
When using Windows 7 or Vista, you can check system window in the control panel by following these steps:
The operating system will be indicated. The system type will say “64-bit operating system” if a 64-bit processor is used. When the system type says “32-bit operating system”, it means that a 32-bit version is used.
You can also validate by viewing the system information window:
The operating system will then be displayed. If “x-64 based PC” appears, this means that a 64-bit version is utilized. If “x-32 based PC” appears, it means that a 32-bit version is used.
If you are using MS Office 2013 or newer versions, you can check the system type by doing the following:
Checking what operating system your computer will enable you to choose appropriate programs and applications to install on your PC. However, you should bear in mind that if you are using Windows 7 or Windows Vista with a 64-bit version, it does not always mean that your MS Office also has the same version. This is why you should always verify prior to doing any changes in your computer.
There are rare instances when you can’t validate the information you need even when accurately follow the steps provided. When you encounter this problem, it is best to get help from professionals who are experienced in dealing with these kinds of issues.
SoftwareKeep is a trusted software reseller and a Microsoft Certified Partner. We exist to make technology accessible by helping people like you choose the perfect product, get a great deal, and install it easily – so you can enjoy your software immediately.If you’re looking for genuine Microsoft software at the cheapest price – complete with 24/7 customer support and advice – you’re in the right place.
]]>When you purchase any product like Microsoft Office from SoftwareKeep, you will receive free assistance from our experts to help you get your Office suite back up and running. Below are some helpful instructions to help you get back to work in no time at all.
The instructions are different depending on which version of Office you have. If you have the Student edition or Home edition, then you need one set, whereas all of the Business suites have separate instructions. Thankfully, this is not true for 2016 and 365. Regardless of which version of you have between those two, the instructions are the same.
The versions of Office that are considered “Home” suites include:
The versions of Office that are considered Business suites include:
Once you have determined which version of Office you have, simply continue to the correct set of instructions for reinstallation.
You can get Office 2016 and 365 in either a 32-bit or 64-bit version. The default is the 32-bit version, and this should be the correct choice for you if you are doing basic work in Office. The 64-bit version requires more memory and processing power. It is generally reserved for those who intend to work on very large projects such as:
While mainstream support for the OS ended in 2015, Microsoft is still offering updates to Windows 7 and will continue to do so through 2020. These include critical security updates. So, there’s no reason to quit using the OS now if it fits your needs.
If you’ve already redeemed your product key, you can skip this step.
If you didn’t redeem your product key when you first bought Office, go to www.setup.office.com and sign in with any version of a Microsoft account (Hotmail, Outlook, X Box, etc.). If you don’t have a Microsoft account, sign up for one now.
When prompted, insert your 16-digit code. The cursor should move along with your typing, so there’s no need to click on individual boxes.
Go to www.office.com/myaccount. If you haven’t yet signed in to your Microsoft account, do so now. Make sure this is the account on which your redeemed product key will show up. If you are logged in with a different account, log out and log back in with the correct account.
If you choose the 32-bit version, simply download it by clicking Install. If you select the 64-bit version, choose your preferred language and then select the 64-bit option before clicking Install.
Open the file you’ve downloaded in your browser. If you are prompted with the question “Do you want to allow this app to make changes to your device?”, click Yes.
The installation process should then be automatic.
Follow the prompts to find the new programs in your start menu. At this point, you will either be prompted to agree to the Microsoft License Agreement or else you may be prompted to activate the product. If so, just follow the prompts.
Make sure this is the business account where the product is registered.
The 32-bit will be the default. Go to advanced settings for the 64-bit version. Regardless, after you’ve made your decision, click Install to begin the process.
Open the file you’ve downloaded in your browser. If you are prompted with the question Do you want to allow this app to make changes to your device?, click Yes.
The installation process should then be automatic.
You may be prompted either to accept the Microsoft License Agreement or, rarely to activate the product. If it is the latter, simply follow the prompts.
Regardless of which version of Office you need now or in the future, SoftwareKeep is the best place to purchase Office and other software products. Not only do we offer the lowest prices anywhere on the web on all of our products, guaranteed, we also provide expert assistance in choosing your programs and troubleshooting any problems you have along the way.
Buying Office from SoftwareKeep means never having to worry about download or reinstall issues. We work with you to make sure your programs work to their optimal level. Visit our website at SoftwareKeep today or contact us to find out more.
Microsoft’s latest software offering comes with many sought-after improvements and you have several different options when it comes to installing the software if you have purchased the upgrade. If you are looking to perform a clean install on a new machine without a current OS or if something goes wrong with your initial installation, we have provided the following instructions to do so through a bootable disc (otherwise known as a boot drive).
The first item you will need is a USB flash drive, and you will want to create bootable USB media from ISO for Windows 10, and will have to set your computer’s settings to boot from a USB device.
Open the Media Creation Tool from the USB device and click “Run.”
Click on the “Accept” button on the lower right-hand corner to accept the license terms. (This must be done to install the software, per the developer).
You will be presented with two clickable options. Select the option “Create installation media for another PC,” and click on the “Next” button.
You again have two options to choose from. You can either select your language, software edition (Windows 10, in this case) and either 32 or 64-bit. It is recommended that you try 64-bit first if you aren’t sure which option you should select.
You can also simply check the box “Use the recommended options for this PC” and let the tool automatically configure it for you.
Select USB Flash Drive or ISO File.
In order to start from bootable media that you have created, you might need to change your Basic Input/Output System or BIOS. Here are the steps to do so:
To enter your computer’s BIOS, you must first start your computer. When you are prompted, press Del, Esc, F2, F10, or F9 to enter the system’s BIOS. Usually, you will find the key to enter the BIOS on the screen.
Find and select the Boot Options menu.
Select the correct Boot Media device that you are using (USB, CD/DVD ROM drive) as the first boot device on your computer, and save the setting changes.
Turn your computer off.
Insert the USB or CD/DVD boot media.
Start your computer again to this time boot from the drive you selected.
Insert the drive (USB or CD/DVD) Windows Installation Setup boot media
To start the setup process, you must turn on your computer.
A message prompting you to press a key to boot from the device should appear. Press a key to force your computer to use Windows Installation Setup boot media upon starting.
Windows Setup will load and you will see the Setup window on your screen. You will be given your Windows Setup Options and will be able to Select Your Regional Settings. This will configure your preferred language, time, currency format, and keyboard type.
Click the button to “Install Now”.
You will be prompted to enter your Windows Product Key:
Once you have located and entered the key, click Next.
Accept the License Terms. It is recommended that you read the terms of the software license before agreeing to them. You can select the box stating “I accept the license terms” and can then click Next.
Select Custom Installation.
Choose which hard drive and partition you would like to install Windows on. You can also choose to Delete All Partitions so that Windows Install will install the OS on the hard drive that you have selected.
Warning: if you delete all partitions, all of the data on the hard drive (software, applications, and files) will be destroyed, so make sure to back everything up that you want to keep!
Install Windows on your chosen hard drive or partition. Click the Next button and the installation should begin.
You will be prompted to personalize your settings, including preferred browser, connectivity, error reporting, and security. You can choose to customize these settings yourself, or can click Use Express Settings to customize.
Identify who owns the device. You will be asked “Who Owns this PC?” and you can sign in with your personal or company ID (which will let you access the company’s resources, if using Windows 10 for work).
Use your Microsoft account to log into Windows 10. This will allow you to take advantage of Microsoft’s suite of applications (which they highly recommend) including Skype, Office, Outlook.com, OneDrive, or Xbox.
Once installation has been completed, you can remove the Windows Install media and can click Finish/Restart to restart your computer and run your new Windows 10 Operating System!
If you are looking to purchase the software you need a a price you can afford, look no further than SoftwareKeep. In addition to our highly-competitive prices, we offer exceptional customer service to ensure that you are satisfied with your purchase and are able to install and run the software that you purchased. We are here for you every step of the way, from sales to installation to support!
To find out more about the products we sell and how we can help you, visit our website at SoftwareKeep today or contact us to find out more.
Last year, Microsoft had a promo wherein Windows 7 users could upgrade their devices to Windows 10 for free. However, upgrading to Windows 10 was hard because you could not use the Windows 7 product keys right away. You had to update your system and then validate the upgrade before making a clean installation with ISOs and upgrade media.
The purpose of this process was to ensure that your device had Digital Entitlement. That way, you could make a fresh install from the same device. However, Microsoft has changed the upgrade process. You do not need to perform the task mentioned above and get Digital Entitlement. You can use your Windows 7 product keys to begin updating. However, you still need to do the clean install before upgrading your operating system.
Before we discuss how to upgrade your Windows 7 laptops to Windows 10, you need to know what product keys are. A product key is a combination of numbers and letters of any length that software needs during installation. Its purpose is to help manufacturers verify that the software copy was legally bought. Product keys are like passwords. You cannot use a particular program if you do not have it. Otherwise, the program will run, but you can only use the full version as a trial. Product keys have restrictions.
For example, you can use this key per person and per program. However, some product keys can be utilized by many people. However, you cannot use the same key at the same time. Now that you know what a product key is, it is time to discuss the step-by-step guide to updating your Windows 7 to Windows 10. To do this, you need to perform the following tasks:
You are lucky if you locate the key in your gadget. However, if you do not know where it is, you may need to use a program that finds the device’s product key.
Even if you are just planning to upgrade your PC, it is important to have another copy of your records. Who knows, something can go wrong while installing the operating system. If you encounter a problem while installing the new operating system, you will not have to reproduce all those files because you have a backup.
Use the Media Creation Tool and choose “Create installation media for another PC.” A page will pop up, which allows you to choose whether you want to burn a bootable DVD or create a bootable flash drive.
Before installing Windows 10, the device will give you a review of your choice and what will be saved through your upgrade. You can choose the “Keep personal files and apps” or “Keep personal files only” to save all valuable data. However, if you want a clean installation, choose “Nothing.”
There are two ways to enter the product key. It depends on when the software will ask for it. There are cases wherein the computer requests the key during installation. If so, you need to enter the code in the space provided and click on the Next button to continue the installation.
However, if your device does not ask for it during the installation of Windows 10, you need to take note of the following steps:
As you can see, upgrading your Windows 7 to Windows 10 is easy. You just need to follow these steps to get the latest operating system. You can repeat the same procedure and use the same Windows 7 key if you want to reinstall Windows 10. That is because this key is already linked with the digital license, which allows you to reinstall the system, even if Microsoft cancels this method of getting Windows 10.
You can also log in to your computer using your Microsoft email account, and your Windows 7 product key will also be associated with your account. That way, you can reactivate your license if you want to reinstall Windows 10 again.
If you lose your product key, or if you purchase software from a shady source that could be selling bootlegged software, a product key may not be available or the product key might come back as invalid. Even if you have purchased your software legitimately, you can run into issues that can give you headaches if you don’t have the product key available during installation. Should you ever uninstall your software and then try to install it again without a valid product key, you will spend a lot of time with Microsoft teh support trying to get your Microsoft Office authorized.
At SoftwareKeep, we are always here to help. We are a Certified Microsoft Reseller and only sell genuine Microsoft products. You will always be notified of your product key and licensing information. We pride ourselves on bringing you the best software at the lowest prices, and we offer around the clock customer support and tech service to ensure you purchase the right software and get it installed and implemented appropriately. When you need software, trust SoftwareKeep to be there for you.
]]>This is one of the easiest methods to reboot in Safe Mode. Simply hit the Windows key + R, then type in msconfig into the box that pops up. That should bring up the System Configuration menu. Go to the Boot tab at the top. Choose to reboot in Safe Mode, then click OK. At that point, Windows will ask if you want to restart now or exit without restarting. If you still have work to save, exit without restarting. Otherwise, restart.
Another simple method. Click on the Start button, and then click on the power button. Now, while holding the shift key, click restart. When Windows reboots, it will ask if you want to troubleshoot or return to Windows 10. Choose to troubleshoot. On the next screen, choose Advanced options. On the next screen, choose Startup Settings. At this point, Windows will tell you what your restart options are. Click restart. After Windows 10 reboots, choosing the Safe Mode option you prefer. With F4, you simply enable Safe Mode. With F5, you get Safe Mode with Networking. And, F6, you get Safe mode with Command Prompt. Choose the version that works best for your needs.
Hit the Windows key + I and go to your Settings. Then, go to Update & security. When you open that, click on Recovery. Under Advanced startup, click Restart now. When the computer restarts, follow the steps in the Shift + Restart topic to get to the Safe Mode options.
Somewhat similar to the old Safe Mode tricks, you can convince your computer while it boots to enter Safe Mode by interrupting the boot process. While your computer is booting, hit the reset or power button. Do this four times in a row, and you’ll see that Windows is Preparing Automatic Repair. When that loads, go to Advanced options instead of Restart. This will take you to the same troubleshooting page in Shift + Restart, and you can follow the same instructions.
Whether your issues involving booting in Safe Mode or are completely unrelated, you need a place where you can go with all your troubleshooting needs. Thankfully, SoftwareKeep offers the best expert assistance on the web for all your software concerns. On top of that, we also have the guaranteed lowest prices for all your new software needs.
Whether you’re looking to resolve a computer issue or buy the latest software, visit our website at SoftwareKeep today or contact us to find out more.
As your presentations need to be accessible, it’s a good idea to insert videos from the internet instead of uploading them yourself. Uploading a video from your computer can drastically increase the file size of your presentation, which is a definite setback unless you need or prefer offline playback.
However, it’s not entirely clear from the get-go how you can insert videos from websites such as YouTube when working with Microsoft PowerPoint. In this article, we’ll show you multiple ways that make it simple to embed any video from the popular video-sharing site.
Jump To:
There are different ways to insert YouTube videos into your presentation. All of these methods work for different purposes — find the one most convenient for you below.
As the use of YouTube videos has grown over the years, Microsoft has implemented a feature that allows you to search YouTube without having to leave PowerPoint itself. This doesn’t only make it simple to add a video to your slide but speeds up your workflow as there’s no need to juggle multiple windows at once.
Note: If you want your video to play inside your presentation, you’ll need a working connection to the internet when presenting. If you want to know how to add a YouTube video to your presentation with offline playback, skip to Method 4.
Here’s how to use the “Search YouTube” feature and add a YouTube video to your presentation.
Every YouTube video has a unique embed code that you can use to put the video on different platforms, such as websites or even PowerPoint presentations. Using this code, you can quickly include a needed video in the slide you’re working on.
Here are the steps to obtain a YouTube video’s embed code and use it to add the video to your PowerPoint presentation.
If you’re not looking to play your video straight from PowerPoint, you can use a link to embed your video and open it inside a web browser. This is a very simple solution if you want to narrate a video or simply don’t require any other information to be shown on the screen while the video is playing in fullscreen.
Note: If you want your video to play in a web browser after being clicked on in your presentation, you’ll need a working connection to the internet when presenting. If you want to know how to add a YouTube video to your presentation with offline playback, skip to Method 4.
Here’s how to link your video in PowerPoint and open it in a browser.
For those looking to play videos offline, downloading and inserting the desired video from your computer is a reliable option. Here are all the steps you need to take to obtain a YouTube video easily and add it to your presentation without needing any internet when holding your presentation.
At the time of writing, there’s only one method to insert videos on Mac operating systems. This makes the process more streamlined, allowing users to easily memorize the process and utilize it quickly in future projects.
Here’s how to insert a video into PowerPoint on a Mac device.
In this video, you'll also learn how to add background music for all slides in PowerPoint, which you can do in your studio very easily:
» How to Reduce the File Size of a PowerPoint Presentation
» Top 10 PowerPoint Tips and Hacks You Need to Know
» PowerPoint Design Ideas Tool and How to Use it
» Microsoft Office PowerPoint cheat sheet
» How to add a gif in PowerPoint