Der NBA 2K22-Karrieremodus ermöglicht es Spielern, ihre Träume zu verwirklichen und das Leben eines NBA-Stars zu erleben. Es kann jedoch unglaublich frustrierend sein, wenn das Spiel nicht wie erwartet funktioniert und der Fortschritt in Ihrer Karriere blockiert wird. Dieses häufige Problem kann Sie daran hindern, im Spiel voranzukommen, und einige Benutzer befürchten, ihren Fortschritt ganz zu verlieren.
Wenn Sie Probleme damit haben, dass der NBA 2K22-Karrieremodus nicht funktioniert, machen Sie sich keine Sorgen! In diesem Artikel finden Sie Schritt-für-Schritt-Anleitungen zur Behebung dieses Problems und zur Rückkehr zu Ihrem Streben nach Basketball-Größe. Wir werden auch mögliche Ursachen des Problems und Lösungen besprechen, die helfen können, das Problem schnell zu lösen, damit Sie wieder mit dem Spielen beginnen können.
Gehe zu
- Starten Sie Ihr WLAN und Ihr Spiel neu
- Reparieren Sie Ihre lokale MyCAREER-Datei
- Speichern Sie Ihren Spielfortschritt manuell
- Löschen Sie den NBA 2K22-Spielcache
- Deaktivieren Sie das Steam-Overlay
- Überprüfen Sie die Integrität Ihrer Spieledateien
- NBA 2K22 neu installieren
Behoben: NBA 2K22 Meine Karriere funktionierte nicht
Es gibt viele Gründe, warum Ihr Spiel möglicherweise nicht wie erwartet funktioniert. Häufige Ursachen sind beschädigte Spieldateien, ein Problem mit der Internetverbindung und gelegentliche Fehler oder Störungen im Spielcode. Schauen wir uns an, wie Sie jedes dieser Probleme beheben können.
1. Starten Sie Ihr WLAN und Ihr Spiel neu
Dieser Trick ist der einfachste Weg, wieder ins Spiel zu kommen. Durch einen Neustart des Spiels und Ihrer WLAN-Verbindung können die meisten kleineren Probleme behoben werden, z. B. wenn Sie in einem Ladebildschirm stecken bleiben oder keine Verbindung zu anderen Benutzern online herstellen können.
Befolgen Sie die nachstehenden Anweisungen, um Ihre Komponenten ordnungsgemäß neu zu starten und zu prüfen, ob das Spiel wie erwartet funktioniert:
-
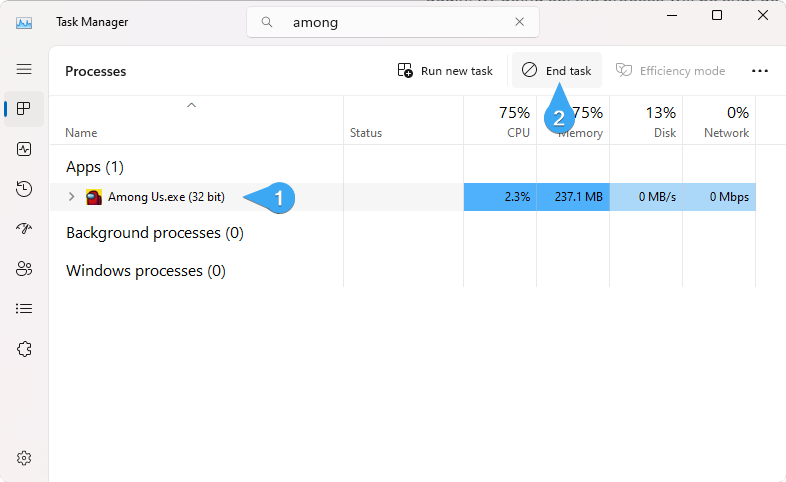
Zuerst müssen Sie NBA 2K22 vollständig schließen.
-
Suchen Sie dann die Taste Wi-Fi auf Ihrem Gerät und schalten Sie es aus.
- Als nächstes starten Sie das NBA 2K22-Spiel. Nachdem Sie die App vollständig geladen haben, schalten Sie Ihr WLAN über die Bedienelemente Ihres Geräts wieder ein.
-
Suchen Sie im NAB 2K22-Menü nach der Option zum Verbinden mit den 2K-Servern. Dadurch erhalten Sie Zugriff auf Online-Funktionen wie den Karrieremodus und den Mehrspielermodus.
- Wählen Sie abschließend die Option „Karrieremodus“, um mit dem Spielen zu beginnen.
2. Korrigieren Sie Ihre lokale MyCAREER-Datei
Wenn Ihre gespeicherte MyCAREER-Datei in NBA 2K22 fehlt oder beschädigt ist, wird beim Laden möglicherweise eine Fehlermeldung angezeigt. Die Meldung wird wahrscheinlich lauten: „Diese Sicherungsdatei ist beschädigt und kann nicht geladen werden.“„Glücklicherweise können Sie ein paar Dinge tun, bevor Sie Ihren Fortschritt zurücksetzen.
Anleitung für PlayStation 4
Um auf Ihre gespeicherten Spieldaten auf PS4 zuzugreifen, laden Sie sie aus der Cloud herunter. Wenn die Funktion „Automatische Aktualisierung“ aktiviert ist, werden Ihre Spieldateien automatisch in die Cloud hochgeladen. Führen Sie die folgenden Schritte aus, um die gespeicherten Spieldaten herunterzuladen.
-
Öffnen Sie zunächst das Spiel und gehen Sie zum Menü Einstellungen im Spiel. Suchen Sie nach der Option „Application Data Management“ und wählen Sie sie aus.
-
Als nächstes sollte eine Option für „Gespeicherte Daten im Online-Speicher“ angezeigt werden." Wählen Sie diese Option und dann „Download to System Storage“, um den Downloadvorgang zu starten.
-
Wenn Sie aufgefordert werden, auszuwählen, welches Spiel heruntergeladen werden soll, wählen Sie NBA 2K22 aus, indem Sie die Taste X auf Ihrer Konsole drücken.
-
Sobald Sie das Spiel ausgewählt haben, sollte eine Dateiliste angezeigt werden, die mit „MyCareer“ beginnt." Sie müssen diese Dateien herunterladen, um Ihre gespeicherten Spieldaten wiederherzustellen. Lade sie alle auf den Systemspeicher deiner PS4 herunter.
Nachdem die Downloads abgeschlossen sind, können Sie NBA 2K22 erneut spielen und Ihre gespeicherten Spieldaten sollten wiederhergestellt sein.
Anleitung für PlayStation 5
Ähnlich wie bei einer PlayStation 4-Konsole müssen Sie auf einer PlayStation 5 die gespeicherten Daten mit der Cloud synchronisieren. Stellen Sie sicher, dass Sie die Funktion „Automatische Updates“ aktiviert haben. Nach dem Synchronisieren und Hochladen können Sie die gespeicherten Daten vom Cloud-Speicher in den PS5-Speicher herunterladen, indem Sie die folgenden Schritte ausführen.
Sobald die gespeicherten Daten synchronisiert und in den Cloud-Speicher hochgeladen wurden, können Sie sie ganz einfach auf Ihren PS5-Speicher herunterladen, indem Sie die folgenden Schritte ausführen:
-
Gehen Sie zunächst zum Menü „Einstellungen“ und wählen Sie „Spiele/Apps“." Wählen Sie dann „Gespeicherte Daten", um das Menü zur Verwaltung gespeicherter Daten zu öffnen.
-
Wählen Sie entweder „Gespeicherte Daten (PS5)“ oder „Gespeicherte Daten (PS4)“, je nachdem, welche Konsole Sie verwenden habe zuvor NBA 2K22 gespielt.
-
Wählen Sie „Cloud Storage“ und dann „NBA 2K22“ aus der Liste der Spiele.
-
Wählen Sie abschließend „Auf Konsolenspeicher herunterladen“, um die gespeicherten Daten vom Cloud-Speicher auf Ihren PS5-Speicher herunterzuladen.
Anleitung für Xbox
Wenn Sie eine Xbox-Konsole verwenden, können Sie Spieldaten nicht manuell in der Cloud speichern. Solange Sie jedoch mit Xbox Live verbunden sind, werden Spieldaten automatisch von Microsoft Cloud Exchange hoch- und heruntergeladen .
Anleitung für Steam
Wenn Sie NBA 2K22 auf Steam spielen, haben Sie Glück. Einer der größten Vorteile des Spielens auf einem PC ist der direkte und manuelle Zugriff auf Ihre Dateien. Steam erstellt außerdem Backups Ihrer Spieldateien, sodass Sie diese jederzeit wiederherstellen können.
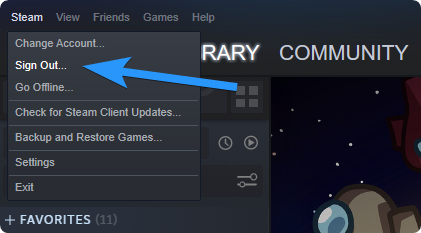
- Um zu beginnen, starten Sie den Steam-Client auf Ihrem Computer.
-
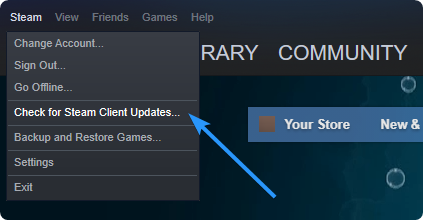
Sobald Sie Steam gestartet haben, suchen Sie in der oberen linken Ecke der Steam-Anwendung nach der Option „Steam“. Klicken Sie darauf, um das Dropdown-Menü zu öffnen.
-
Wählen Sie „Spiele sichern und wiederherstellen“.“ aus dem Dropdown-Menü, das Sie zum Backup- und Wiederherstellungsmenü führt.
-
Wählen Sie dort „Vorheriges Backup wiederherstellen“, woraufhin Sie aufgefordert werden, den Speicherort der Backup-Dateien des Spiels zu durchsuchen. Sie sollten die Sicherungsdateien im standardmäßigen Steam-Sicherungsordner finden können.
- Sobald Sie die Sicherungsdateien gefunden haben, fahren Sie über Steam fort, um das NBA 2K22-Spiel wie gewohnt zu installieren. Dadurch werden Ihre gespeicherten Spieldaten wiederhergestellt.
Anleitung für Nintendo Switch
Sie benötigen eine Nintendo Switch Online-Mitgliedschaft, um diese Funktion nutzen zu können. Wenn Sie ein Nintendo Switch-Benutzer sind und Ihre Spieldaten-Backups für NBA 2K22 speichern und herunterladen möchten, können Sie dies ganz einfach tun, indem Sie die folgenden Schritte ausführen:
- Öffnen Sie zunächst das Softwaremenü des Spiels, um Backups aus dem Softwaremenü des Spiels herunterzuladen.
-
Wählen Sie „Save Data Cloud“ aus dem Menü aus, um zum Cloud-Speicherdatenverwaltungsmenü zu gelangen.
-
Wählen Sie das Benutzerprofil aus, für das Sie die Speicherdaten herunterladen möchten, und wählen Sie dann „Speicherdaten herunterladen“.„
- Folgen Sie den Anweisungen, um die Speicherdaten für das ausgewählte Benutzerprofil herunterzuladen.
Alternativ können Sie Backups auch über das Menü „Systemeinstellungen“ herunterladen:
-
Wählen Sie im Menü HOME die Option „Systemeinstellungen“.„
-
Wählen Sie „Datenverwaltung“ und dann „Daten-Cloud speichern“.„
- Wählen Sie das spezifische Benutzerprofil aus, für das Sie die Sicherungsdatei herunterladen möchten.
-
Wählen Sie die Sicherungsdatei aus, die Sie herunterladen möchten, wählen Sie dann „Speicherdaten herunterladen“ und fahren Sie entsprechend fort.
3. Speichern Sie Ihren Spielfortschritt manuell
Ein Fehler in NBA 2K22 führt dazu, dass Ihr „Meine Karriere“-Modus nicht funktioniert, z. B. weil der Spielmodus nicht geöffnet wird, auf einem schwarzen Bildschirm hängen bleibt oder Probleme beim Speichern Ihres Spielfortschritts auftreten. Dieses Problem kann durch eine beschädigte Sicherungsdatei verursacht werden, die normalerweise durch Löschen und Ersetzen durch eine neue behoben wird.
Wenn Ihre Sicherungsdatei beschädigt ist, können Sie den Fortschritt leider nur neu starten. Diese Beschädigung kann aufgrund verschiedener Probleme auftreten, darunter Netzwerkverbindungsprobleme, Serverprobleme und ein seltenes Problem mit dem Spiel selbst.
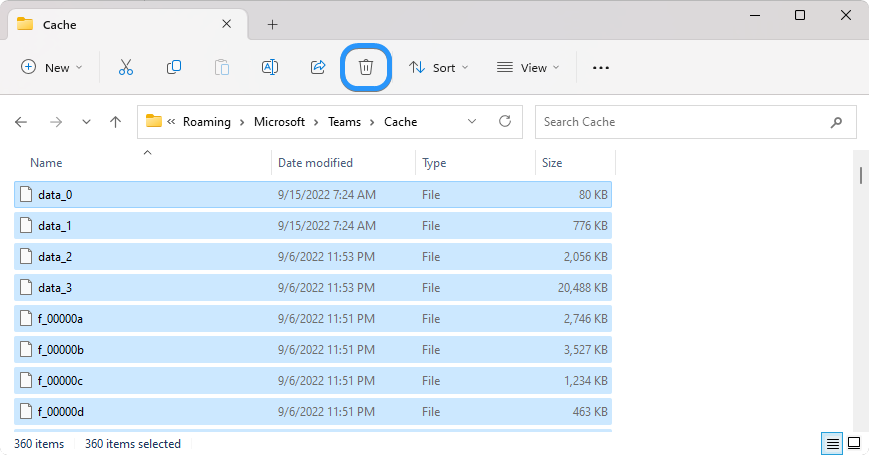
4. Leeren Sie den NBA 2K22-Spielcache
Spiele verwenden Cache-Dateien, um verschiedene Einstellungen und Spieldaten an einem temporären Speicherort zu speichern. Manchmal können diese Dateien beschädigt oder veraltet sein, was zu Problemen führen kann, einschließlich der Unfähigkeit, Ihren Spielfortschritt zu speichern.
Das Leeren des Caches ist ein einfacher Vorgang, der es Ihnen ermöglicht, mit neuen Daten von vorne zu beginnen, wodurch alle Probleme im Zusammenhang mit beschädigten oder veralteten Dateien gelöst werden sollten.
Anleitung für PlayStation
Um das Problem mit dem Karrieremodus auf Ihrer Konsole für NBA 2K22 zu beheben, können Sie versuchen, Ihre Konsole aus- und wieder einzuschalten, indem Sie die folgenden Schritte ausführen:
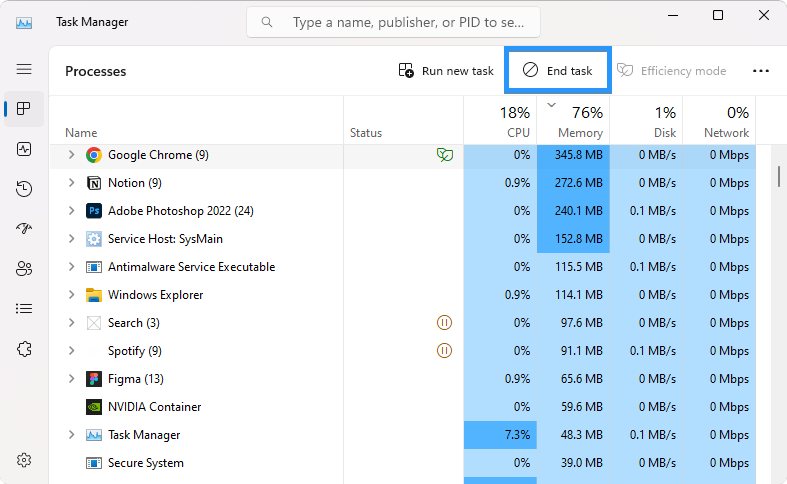
- Schließen Sie zunächst alle Programme auf der Konsole.
-
Drücken Sie als Nächstes die Taste Ein/Aus auf Ihrer Konsole und halten Sie sie gedrückt, bis Sie innerhalb weniger Sekunden zwei Pieptöne hören.
- Warten Sie, bis die Netzanzeige aufhört zu blinken, und ziehen Sie dann das Netzkabel aus der Steckdose.
- Warten Sie etwa 20 Minuten, um sicherzustellen, dass die Leistungskondensatoren vollständig entladen sind. Stecken Sie das Netzkabel nach 20 Minuten wieder in die Steckdose.
- Starten Sie Ihre Konsole und warten Sie, bis sie hochfährt. Starten Sie abschließend NBA 2K22 und prüfen Sie, ob das Problem mit dem Karrieremodus behoben wurde.
Anleitung für Xbox
Um die gespeicherten Daten für NBA 2K22 auf Ihrer Xbox zu löschen, führen Sie die folgenden Schritte aus:
-
Drücken Sie zunächst die Xbox-Taste auf Ihrem Xbox-Controller, um auf das Home-Menü zuzugreifen.
-
Navigieren Sie im Home-Menü zum Menü „Meine Spiele und Apps“ und wählen Sie „Alle auswählen“.„
-
Wählen Sie die Registerkarte „Spiele“ und gehen Sie zum rechten Abschnitt, um NBA 2K22 in der Liste der installierten Spiele zu finden.
-
Sobald Sie NBA 2K22 ausgewählt haben, drücken Sie die Taste „Optionen“ auf Ihrem Controller.
-
Gehen Sie im Optionsmenü zu „Spiel und Add-ons verwalten“, gehen Sie zu „Downloads“ und markieren Sie es „Gespeicherte Daten.„
-
Drücken Sie die Taste „X“ auf Ihrem Controller, um alle gespeicherten Daten für NBA 2K22 zu löschen. Bestätigen Sie die Aufgabe und warten Sie, bis der Vorgang abgeschlossen ist.
- Endlich starten Sie NBA 2K22.
Anleitung für PC
Um den Download-Cache auf Steam zu leeren, führen Sie die folgenden Schritte aus:
- Öffnen Sie den Steam-Client auf Ihrem Computer.
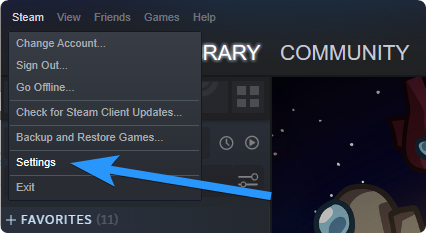
-
Klicken Sie im Menü oben links auf „Steam“ und wählen Sie „Einstellungen“.„
-
Klicken Sie im angezeigten Einstellungsbereich auf die Registerkarte „Downloads“.
-
Scrollen Sie zum Ende der Registerkarte „Downloads“, um die Schaltfläche „Download-Cache löschen“ anzuzeigen.
-
Klicken Sie auf die Schaltfläche „Download-Cache löschen“ und warten Sie, bis der Vorgang abgeschlossen ist.
- Starten Sie Steam neu und prüfen Sie, ob das Problem behoben wurde.
5. Deaktivieren Sie das Steam-Overlay
Wenn Sie NBA 2K22 auf Steam spielen, ist die Wahrscheinlichkeit groß, dass Sie die Steam-Overlay-Funktion aktiviert haben. Dadurch können Sie auf verschiedene Funktionen des Steam-Clients zugreifen, ohne Ihr Spiel schließen zu müssen, z. B. auf Erfolge prüfen, mit Freunden chatten oder Screenshots machen.
Dies kann jedoch manchmal zu Konflikten oder Problemen mit NBA 2K22 führen. Um dieses Problem zu beheben, deaktivieren Sie das Overlay und prüfen Sie, ob das Problem dadurch behoben wird.
- Starten Sie die Steam-Anwendung.
-
Öffnen Sie das Menü „Steam“ über die Navigationsleiste oben im Client-Fenster. Klicken Sie hier im Kontextmenü auf „Einstellungen“.
-
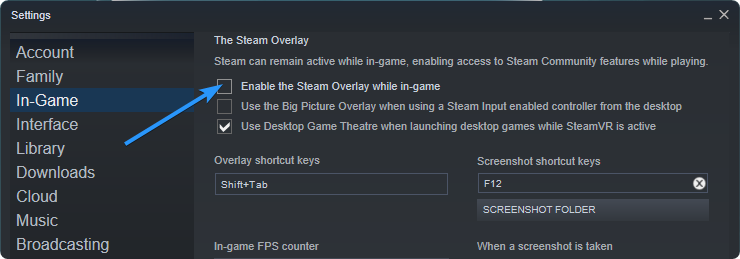
Wechseln Sie über das Menü auf der linken Seite zur Registerkarte „Im Spiel“. Stellen Sie sicher, dass das Kontrollkästchen neben „Steam-Overlay im Spiel aktivieren“ leer ist. Das bedeutet, dass das Steam-Overlay deaktiviert ist. Wenn die Funktion aktiviert ist, klicken Sie einmal auf das Kästchen, um sie zu deaktivieren.
-
Klicken Sie auf OK, um Ihre Änderungen abzuschließen, und versuchen Sie, Elden Ring neu zu starten.
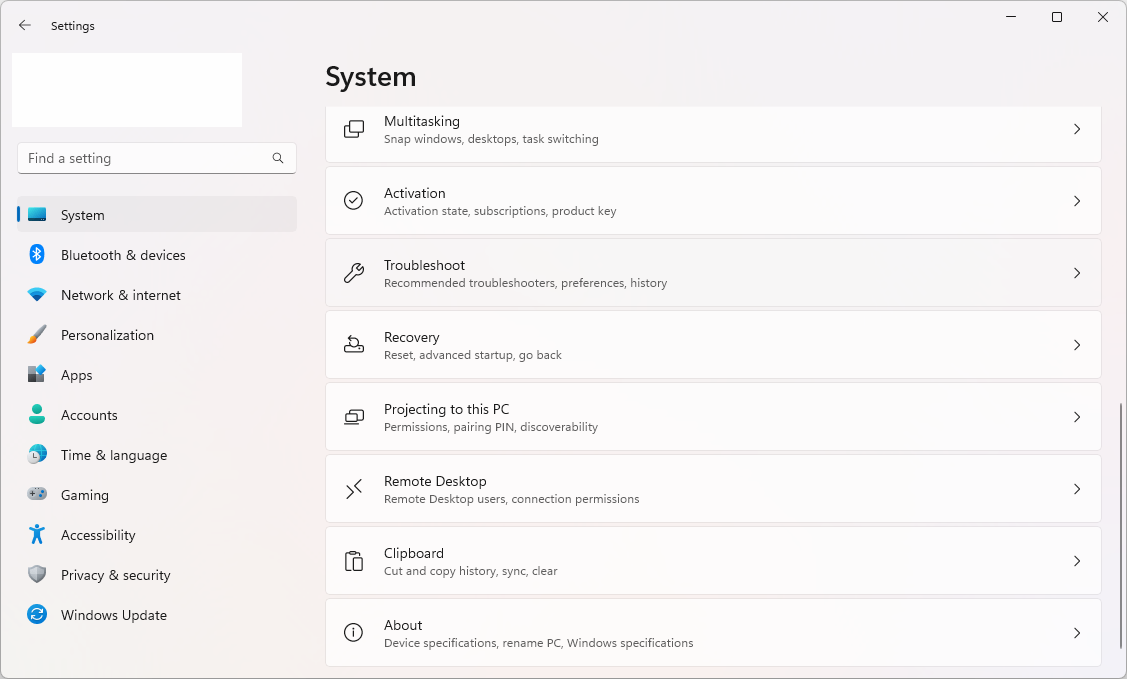
6. Überprüfen Sie die Integrität Ihrer Spieledateien
Steam bietet eine weitere hilfreiche Funktion, die Ihnen hilft, beschädigte oder fehlende Spieldateien zu reparieren. Dies wird als „Überprüfen der Integrität von Spieledateien“ bezeichnet und vergleicht alle Spieledateien auf Ihrem PC mit den offiziellen Steam-Versionen.
Wenn Unstimmigkeiten festgestellt werden, werden diese automatisch durch die richtige Version von den Steam-Servern ersetzt. Dies sollte dabei helfen, verschiedene Probleme zu beheben, einschließlich beschädigter Speicherdateien und anderer spielbezogener Probleme.
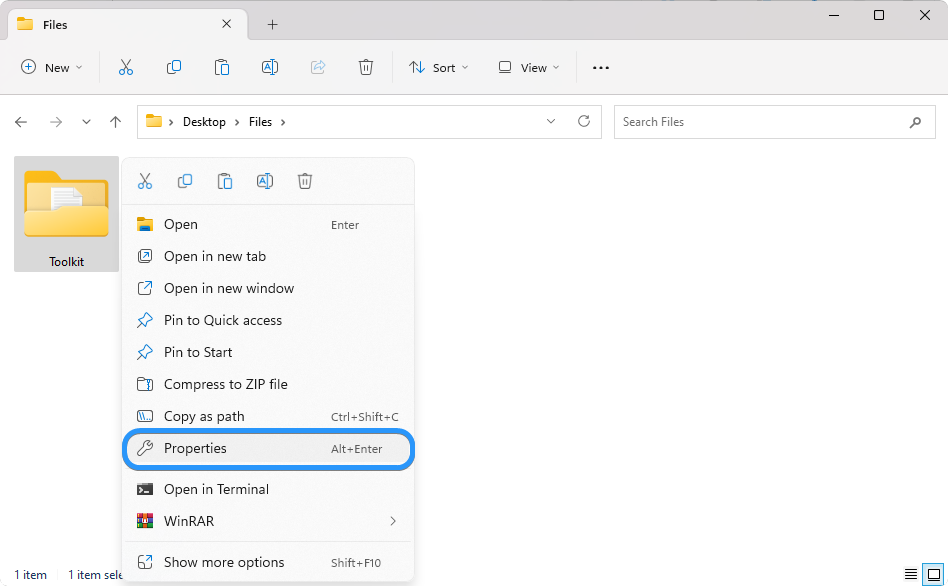
-
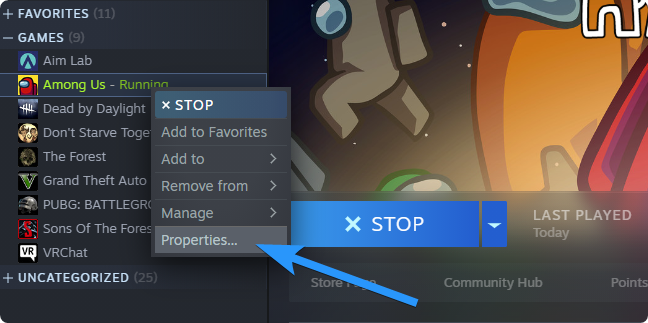
Starten Sie Steam und gehen Sie zur Registerkarte „Bibliothek“. Klicken Sie mit der rechten Maustaste auf Elden Ring und wählen Sie „Eigenschaften“ aus dem Kontextmenü.
-
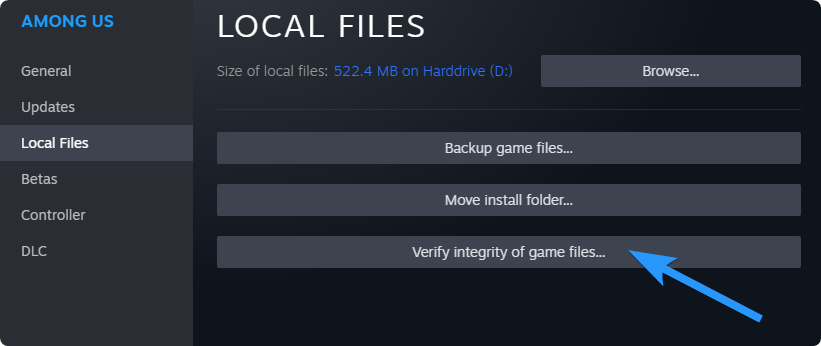
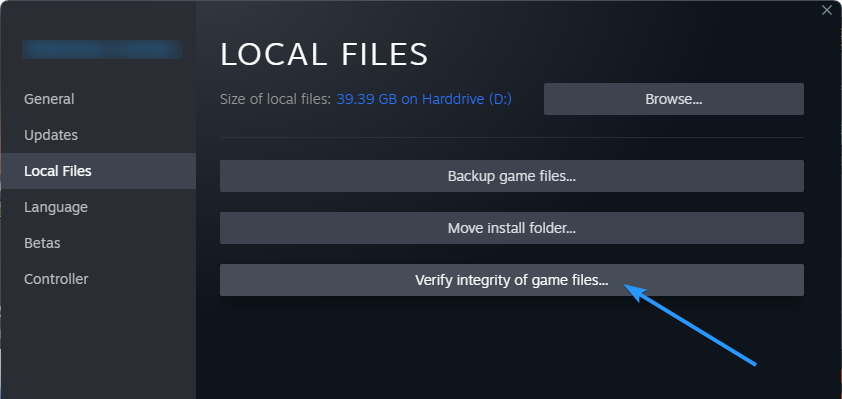
Wechseln Sie im neuen Fenster zur Registerkarte „Lokale Dateien“ und klicken Sie dann auf „Integrität der Spieledateien überprüfen“. Taste.
- Warten Sie, bis Steam Ihre Dateien überprüft hat. Dies kann bis zu mehreren Minuten dauern. Wenn Steam den Vorgang abgeschlossen hat, starten Sie Elden Ring und prüfen Sie, ob der Fehler weiterhin auftritt.
7. Installieren Sie NBA 2K22
neu
Wenn keiner der oben genannten Schritte hilft, müssen Sie möglicherweise NBA 2K22 neu installieren. Dadurch werden alle auf Ihrem Computer gespeicherten Spieldateien gelöscht und durch eine saubere Version ersetzt. Dadurch sollten alle Probleme im Zusammenhang mit beschädigten oder fehlenden Dateien und anderen Konflikten behoben werden, die Sie möglicherweise daran hindern, in Ihrer Karriere voranzukommen.
Anleitung für PlayStation
Folgen Sie diesen Schritten, um das NBA 2K22-Spiel auf einer beliebigen PlayStation-Konsole zu löschen und neu zu installieren:
-
Gehen Sie auf Ihrem Gerät zu „Einstellungen“.
-
Wählen Sie „Speicher“ aus den Optionen aus.
-
Suchen Sie das NBA 2K22-Spiel und wählen Sie es aus der Liste aus. Klicken Sie auf die Schaltfläche „Löschen“, um das Spiel von Ihrem Gerät zu entfernen.
- Besuchen Sie nach dem Löschen des Spiels den Store, von dem Sie das Spiel heruntergeladen haben. Suchen Sie im Store nach dem Spiel NBA 2K22 und laden Sie es herunter.
- Sobald der Download abgeschlossen ist, installieren Sie das Spiel erneut und prüfen Sie, ob Sie den Modus „Meine Karriere“ spielen können.
Anleitung für Xbox
Um NBA 2K22 auf Ihrer Xbox-Konsole neu zu installieren, führen Sie die folgenden Schritte aus:
-
Öffnen Sie das Menü „Guide“, indem Sie die Xbox-Taste auf dem Controller drücken. Wählen Sie „Meine Spiele und Apps“ > „Spiele“ > „Bereit zur Installation<“. t1>.„
-
Wählen Sie NBA 2K22 und drücken Sie die Menütaste auf Ihrem Controller. Wählen Sie „Spiel und Add-ons verwalten“ oder „App verwalten“.„
-
Wählen Sie „Alle deinstallieren“ und warten Sie, bis der Vorgang abgeschlossen ist.
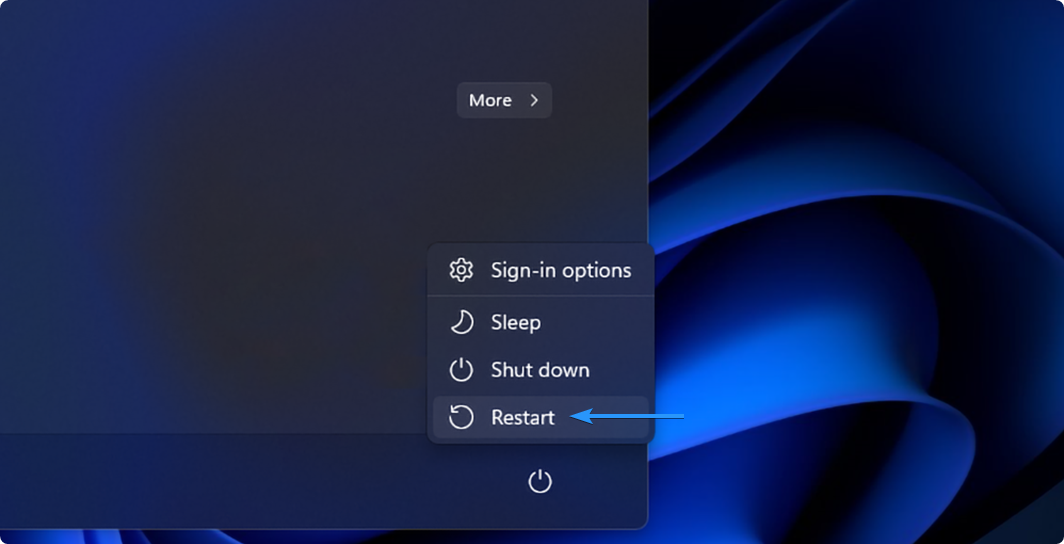
- Starten Sie das System neu.
-
Öffnen Sie erneut das Menü „Guide“ und wählen Sie „Meine Spiele & Apps“ > „“. Spiele" > "Bereit zur Installation.„Wählen Sie NBA 2K22 und wählen Sie „Installieren“.„
- Warten Sie auf den Installationsvorgang und starten Sie die Konsole neu.
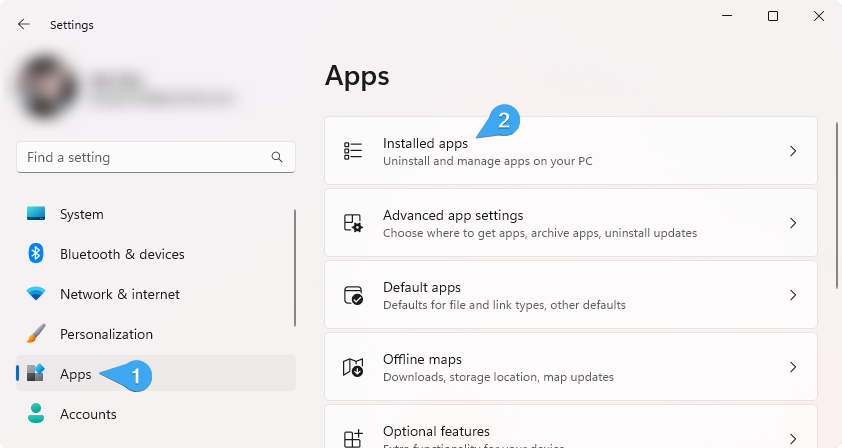
Anleitung für PC
Hier sind die Schritte zur Neuinstallation von NBA 2K22 auf Steam:
-
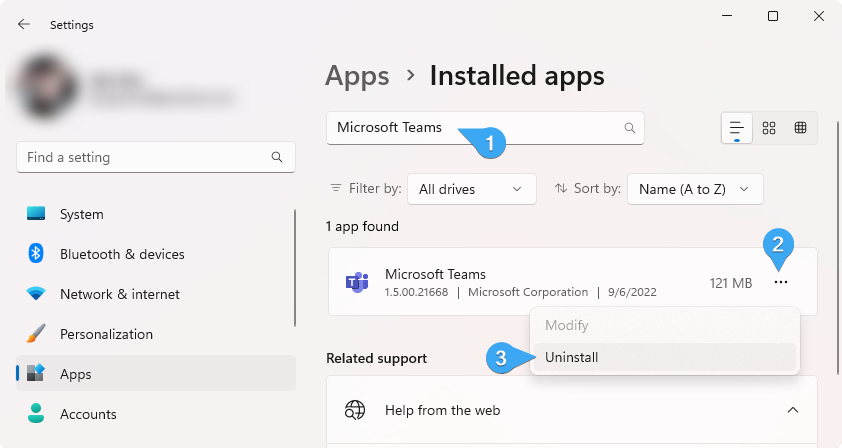
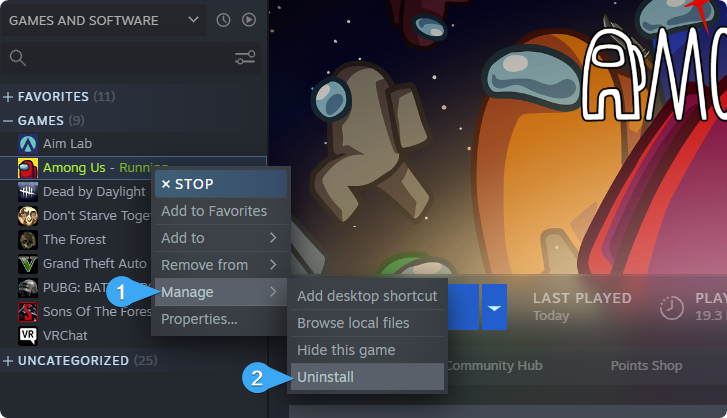
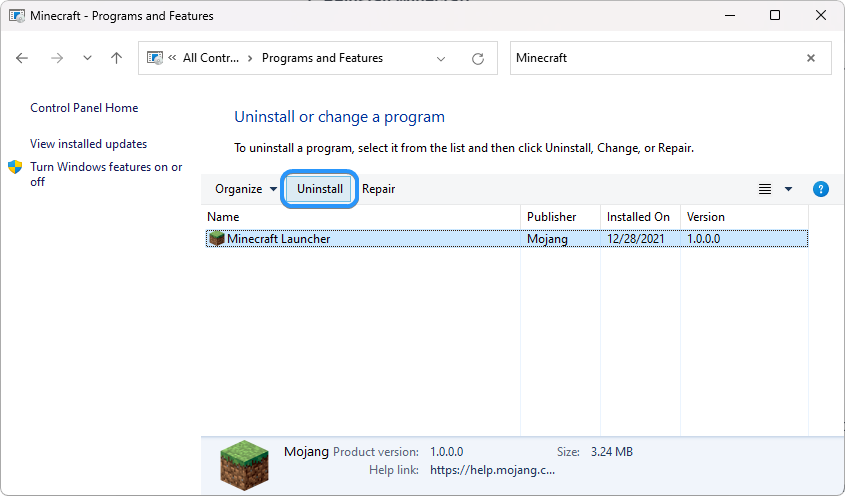
Öffnen Sie den Steam-Client und klicken Sie auf „Bibliothek“. Suchen Sie NBA 2K22 in der Liste der installierten Spiele und klicken Sie mit der rechten Maustaste darauf.
-
Klicken Sie auf „Deinstallieren“ und bestätigen Sie die Aufgabe. Warten Sie, bis der Deinstallationsvorgang abgeschlossen ist.
-
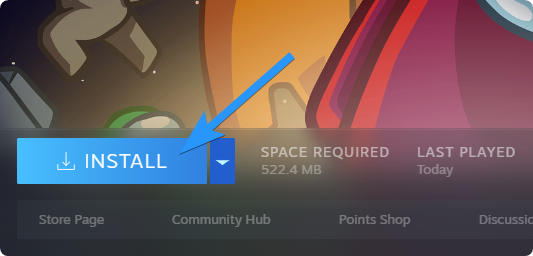
Sobald das Spiel deinstalliert ist, klicken Sie auf der Steam-Seite des Spiels auf „Installieren“. Wählen Sie aus, wo Sie das Spiel installieren möchten, und warten Sie, bis der Installationsvorgang abgeschlossen ist.
-
Sobald das Spiel installiert ist, klicken Sie auf „Spielen“, um NBA 2K22 zu starten und zu sehen, ob Ihr Karrieremodus funktioniert.
Fazit
Wenn Sie Probleme haben, Ihren NBA 2K22-Karrieremodus zum Laufen zu bringen, sollten Ihnen diese Schritte dabei helfen, wieder auf den richtigen Weg zu kommen. Vom Neustart Ihres WLANs und Spiels bis hin zur Überprüfung der Integrität Ihrer Spieldateien können Sie die häufigsten Probleme relativ schnell finden und beheben.
Kontaktieren Sie im Zweifelsfall einen Kundendienstmitarbeiter oder besuchen Sie das offizielle NBA 2K22-Supportforum für weitere Informationen. Mit diesen Tipps sollten Sie in der Lage sein, wieder ins Spiel zu kommen und Ihren Weg zur Basketball-Größe fortzusetzen!
Noch etwas
Wir freuen uns, dass Sie diesen Artikel gelesen haben. :) Danke fürs Lesen.
Wenn Sie kurz Zeit haben, teilen Sie diesen Artikel bitte in Ihren sozialen Netzwerken. jemand anderes könnte auch davon profitieren.
Abonnieren Sie unseren Newsletter und lesen Sie als Erster unsere zukünftigen Artikel, Rezensionen und Blogbeiträge direkt in Ihrem Posteingang. Wir bieten auch Angebote, Werbeaktionen und Updates zu unseren Produkten an und teilen diese per E-Mail. Sie werden keinen verpassen.
Ähnliche Artikel
» So beheben Sie den Absturz von Fallout 4 beim Start
» Behoben: Fehler „Steam-Neustart erforderlich“ in Elden Ring
» So spielen Sie Minecraft gemeinsam auf PC und Xbox
]]>